Wednesday, June 20, 2012

Lori's Macaroni Salad

                                                                                                                                                         
I really like macaroni salad in the summer, but I hate the store-bought kind as it tastes old and is usually too soupy. It is so easy to make your own that I do not know why people bother to buy the nasty stuff in the stores. There are so many variations on making macaroni salad that I will give you the version I like to make, but then in the 'tips' I will tell you some of the add-ins you can use to make it truly yours. Some people add black olives (which I hate, but which you may love!), grated or cubed cheese, pimento, frozen peas that have been thawed, or even tuna in order to make this more of a main course instead of a side dish.
  Really, the sky's the limit when it comes to any kind of pasta salad as there are literally hundreds, if not thousands of ways to make these. However, this one is really good, sticks with a more traditional approach, and will get you raves of 'more' from your family.
  Also, this is a basic guide as I tend to 'dump in a little of this and that' as that is how I cook! Please feel free to add or take away the things you don't like in this salad to fit your own tastes.
  This is a large recipe as I am used to cooking for a crowd so don't be afraid to half this if you don't need such portions! If you are going to a cook out, then make the entire amount. Any leftover you can bring home for your family to finish off, but I doubt you have any leftover.

Lori's Macaroni Salad

16 ounces of elbow macaroni*
1 cup diced onion (I like mine almost minced)
1 cup diced celery (again, I like mine cut small)
1/2 cup grated carrots
1/2 of a green pepper, diced small
1/4 cup of pickle relish*
1- 1 1/2 cups Miracle Whip*
1-2 Tbls. of organic sugar or sugar*
1 teaspoon yellow prepared mustard
Real Sea Salt and pepper, to taste
4-6 boiled eggs, peeled
Paprika

Cook macaroni according to directions on box. Drain; rinse with cold water to stop cooking; drain again; set aside.

Chop all your vegetables, then combine with 1 cup of the Miracle Whip.* If too dry, add some more. You don't want it soupy, but you also don't want it to dry out. Pasta has a way of soaking up liquids.

Combine macaroni with vegetable mixture and blend well.

If using 6 eggs, chop up 4 eggs and combine in salad, then slice remaining eggs and lay in a pattern on top of salad.

Sprinkle with paprika.

Cover and store in fridge for several hours so the flavors combine.

Serve and enjoy!

Tips:
*Elbow macaroni is my preference; do not be afraid to use shells, rotini, or your choice of pasta.
*Instead of pickle relish you can chop up Gherkin pickles or use a spicy pickle of your choice.
*Instead of Miracle Whip, make your own favorite homemade mayonnaise, then add some mustard,
  lemon juice, and sugar to make it tangy and delicious.
*You can use Rapadura or Succanat instead of processed sugar.
*Add ins: Cubed cheese, grated cheese, toasted canned peppers, black or green olives, frozen peas, diced green onions, diced red onions, 1-2 cans of tuna, well-drained, pimentos, capers, spicy pickles, chopped, Gherkin pickles, chopped, red peppers, diced, capers, a sprinkling of dill weed, snipped fresh chives, diced ham, shrimp, diced radishes...and the list goes on with your creativity.


Thursday, June 14, 2012

Lori's Fried Chicken

Lori's Fried Chicken

This is how I make my fried chicken. Many people are afraid of making fried chicken because they think it is too hard, but as these pictures will show, it is not hard at all. And it is very tasty, moist, and delicious. You can also use bone-in chicken with the skin on, but it will take longer to cook. If you use bone-in chicken breasts with the skin, then make sure you follow directions below for browning and then finishing off in the oven. Unless you buy chicken from the farm, most chicken today have breasts that are super large and difficult to get cooked through using conventional frying.

Take a basic piece of chicken, such as this boneless, skinless chicken breast, and wash and dry it. Remove any excess fat.

On a cutting board, pound the chicken evenly so that it is not as thick. This helps to break down the muscle tissue, which makes it more tender, and also, it makes the chicken more uniform in size so that it cooks more evenly. How do you dig that meat tenderizer? It came from a Kmart Blue Light special back in 1979 and I paid .10c for it! It is still going strong!

Choose which herbs and spices you want to use to season your chicken. I use paprika, thyme, parsley, poultry seasoning, Real sea salt, black pepper, some Sylvia's Secret Seasoning (in the baggie), seasoned salt, garlic powder, basil, and whatever happens to suit my fancy! I take about 1 cup of unbleached flour and place it in a gallon Zip-loc bag, dump in seasonings, just what looks right, and blend it well. I like a seasoning that you can taste, but one that is not overpowering. I tend to be a 'dump' cook as I 'dump a bit of this, and dump  a bit of that', but don't be afraid to use some spices and herbs!

This is what it all looks like once it is mixed up in the bag. You can see all those herbs and spices mixed in with the unbleached flour. And it smells divine!

I add a little extra season salt to the chicken before I coat it with the flour. I like the added seasoning.


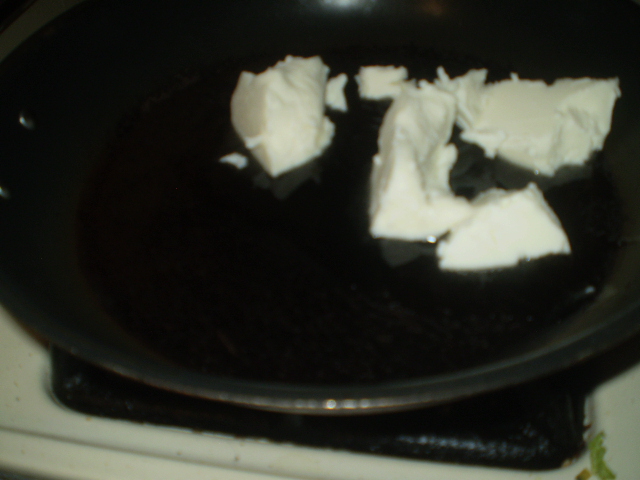
Melt some shortening or oil in the skillet you will be using. I have organic palm shortening in the pan above that is melting. Palm shortening is a heart-healthy oil. Of course, you can use lard or tallow, coconut oil, or any other healthy oil that you like. I melt about a quarter-inch of oil in the pan.


You want the melted grease to be hot, but not smoking. The trick to good fried chicken (or any fried foods) is to have your fat hot enough to begin cooking the food when it enters the fat. I usually will place a bit of water on my finger and drop it in the oil, if it splatters and 'dances' on the oil, the oil is hot enough to cook with.

Coat your chicken well in the bag with the herbs and spices, then add to the skillet, making sure there is some room so they are not too crowded. You can see the fat is bubbling around the chicken as it is hot enough to be cooking the chicken so that the flour does not soak up all that fat. Allow your chicken to cook for about 10-12 minutes per side. You want to cook your chicken on a medium-low heat so the chicken cooks, but the outside does not burn.

Your chicken will be nice and golden brown when you turn it. Notice the pieces cooking on sides of chicken? That is blood cooking out. Just take a fork and pick those out of the fat and either give to your dog or toss in the trash. Look at how beautiful the herbs look cooked on the chicken.

When chicken is cooked through (you can use a meat thermometer to check for doneness or do what I do and feel the chicken, but this takes years of practice), then move to some absorbent paper on a plate to soak up any extra grease. Look at how nicely browned that chicken is! A deep golden brown, but not burned! Of course, you can use skin on chicken, any pieces of chicken you like as the process is the same. I prefer the boneless, skinless chicken breasts as they are my favorite.

If I do use skin on chicken breasts, the chicken breasts are usually so huge that they will not cook thoroughly on the stove without burning the skin eventually. What I do is to brown the chicken well on all sides, then place the chicken breasts on a cookie sheet (with a lip on sides), and continue to cook by baking in a 350F degree oven for about 30 minutes, You will have the most delicious and moist chicken ever! Delicious!

Now you know how to cook some delicious and juicy chicken!

Here are some ideas for the Flour seasoning mixture:

About 1-2 cups unbleached white flour
About 1-2 Tbls MSG-free seasoned salt (your favorite brand or homemade)
About 1 tsp or so of paprika
About 1 tsp of garlic powder
About 1 tsp of poultry seasoning
About 1 Tbls of parsley
About 1/2 tsp basil (or more, if you like)
About 1/2 tsp Sylvia's Secret Seasoning
About 1/2 tsp black pepper
About 1/4 tsp cayenne pepper, if you want a 'bite' in your seasoning

Blend all ingredients well and keep in plastic Zip-loc bag or other container of your choice. You can add other seasonings and in any amounts. Don't be afraid to play around with this to make it the way you like it.

Lori's Fried Chicken Recipe

Boneless, skinless chicken breasts
Flour seasoning mixture*
Extra seasoning salt
Oil for frying, preferably a heart-healthy choice like Palm Oil Shortening.

Wash and dry chicken breasts.
On a cutting board, pound chicken with a meat mallet on both sides so that the pieces are of a uniform thickness.
Place some palm oil shortening in the skillet, about 1/4 inch of oil, and heat on medium low heat till oil is hot. To test oil, sprinkle a drop or two of water in oil to see if it splatters and dances. When it does, the oil is hot and ready for the chicken.
Place a piece of chicken in the flour mixture and coat well on all sides. Place the chicken in the skillet and then coat another piece until all pieces are coated. You can usually only fry 3-4 pieces at a time unless you use two skillets.
Fry for about 10-12 minutes per side, turning chicken over when it is done frying on one side.
Using a meat thermometer you can check to see when your chicken is done.
Remove from pan and place on paper towels on a plate.
Eat and enjoy!

If you decide to use boned chicken breasts, cook chicken on all sides and cook to a golden brown. Place pieces on a lipped cookie sheet and place in a 350F degree oven. Bake for about 30 minutes. Remove chicken from oven and place pieces on paper towels to drain. Eat and enjoy!

*If you want a crispier crust add about a tablespoon of corn starch to the flour/herb mixture.
If you want a thicker crust- dip chicken in buttermilk and then flour mixture.

Friday, June 8, 2012

Herb Butter

                                                                        
Mmmm....It is so good to add herb butters to home-grown veggies! I love this on corn on the cob, in lima beans, and even a good pat on a rib eye steak. You can adjust this to suit your own tastes, but this is really delicious on so many foods. It also makes a good spread for bread that you plan to toast or broil. If you are not sure if you will like all the components of this butter then make 1/4 of it to try before making an entire pound. This and other herb butters make delicious gifts.

Herb Butter

1 pound butter, room temp*
4 tsp. freshly-squeezed lemon juice
1/2 tsp garlic powder
1 tsp dried oregano
1 tsp. dried chives
1 tsp. dried thyme
1 tsp dried rosemary
1 tsp dried tarragon

With electric mixer, whip butter with lemon juice and garlic powder till smooth. Crush herbs until very fine and add to butter blending well.
Wrap and chill overnight so flavors can blend before serving.
For very special dinners and parties you can use a piping gun and make rosettes on wax paper, or pat into fancy butter molds for individual servings.
Makes 1 pound butter.

Tips:

*Do not use margarine or spreads! Besides being bad for your heart and arteries, it doesn't taste as
  good!
*You can use fresh herbs, but you will have to decide how much of each is enough. Look for a converter chart for dry/fresh herbs.
*Divide butter up into 1/4 pound pieces and wrap well so you can freeze some to keep them fresh and
  use as wanted.

Chicken Enchiladas


These seem to be complicated, but they are not. They are easy and tasty. You can use leftover chicken (whether fried, rotisserie, baked, or grilled), which makes a great new way to use up extra chicken and still have a new meal your family will love. They are rich and filling. Go the extra mile and make these from full-fat ingredients as they will help to fill you up and keep your hunger sated for a longer time. Besides, it is just better for you all the way around as you need healthy fats in your diet.

Chicken Enchiladas
                                                                                         Preheat oven to 350 degrees F
3 cups cooked chicken, cubed
1 cup chicken broth*
1 Tbls. unbleached flour
2 cups of Half and Half cream
1 can (2 oz.) chopped green chilies*
2 tsp. minced onion
1 tsp. real sea salt
1/2 tsp. ground black pepper
2 cups sour cream
12 organic corn tortillas*
1 cup (4 oz.) finely shredded Mexican Blend cheese
Chopped green onion, optional
Sliced black olives, optional
Chopped tomatoes, optional
Fresh cilantro, chopped fine, optional
Organic olive oil spray

Stack tortillas on paper towel and place in oven to warm.
Blend chicken broth and flour in 2 quart saucepan and cook till thickened. Stir in Half and Half, green chilies, chopped onion, salt, ppper, and 1 3/4 cup of sour cream.
Dip warm tortillas in sauce completely coating both sides. Spoon 1/4 cup chicken down center or each tortilla, old up, use some of the sour cream to seal edges.
Spray a 13" x 9" pan with cooking spray. Place tortillas in pan edge down. Repeat till all tortillas are filled with chicken.
Pour remaining sauce over enchiladas. \Bake at 350 degrees for 20-30 minutes, till hot and bubbly.
Remove from oven and sprinkle with cheese. Bake 5 more minutes till cheese melts. Let rest 10 minutes to set up before serving.
Garnish with green onions, cilantro, tomatoes, and sliced olives, if desired.

Tips:
*You can use your own homemade broth or store-bought.
*You can use fresh chilies, if desired.
*Make sure you use organic corn tortillas to avoid GM tortillas as most all corn-related foods in USA
  is made with GM corn products
  .

Fool-Proof Beer Batter For Deep Fried Vegetables


My husband absolutely loves Fair Food. He goes to the fair just so he can eat his way through the midway. I, on the other hand, do not care much for Fair Food as it is costly, greasy, heavy, and cooked in oils I try to avoid. Every once in awhile I will make Bob some of his favorite Fair Foods such as Pulled BBQ Pork sandwiches, soaked and grilled corn on the cob, funnel cakes, or these tasty vegetables.  It can't get any easier than this recipe.

Fool-Proof Beer Batter For Deep Fried Vegetables

1 cup unbleached flour
1 cup beer
Palm oil shortening or lard
Vegetables such as mushrooms, zucchini, onion rings, cauliflower, broccoli, sweet potato slices, or green pepper rings.*
Real sea salt

Combine flour with beer. Cover and refrigerate 3-4 hours before using.
Meanwhile, get vegetable prepared for when you want to use them; set aside till ready to use.
Heat oil in a deep fryer or 2-3 quart pan (at least 3-5" of oil) to 375 degrees F.
Dip vegetables in batter, knowcking off some of the extra, then drop into the oil to fry for 2-3 minutes, till golden brown. Salt to taste.
Drain on paper towels before serving. Serve hot.

Tips:
*This batter is good to use for fish, too.

Delicious No-Bake Cheesecake


I got this recipe from an acquaintance around 10 years or so ago. It was so easy and delicious. I just made a couple of these for two of my grandkids' graduation parties and came back home with empty pans as they were wiped out. I made one with a canned cherry pie filling, and the other with fresh, sliced strawberries. I often make one of these to keep in the freezer so I can pull it out and have an instant dessert. The topping can be added once it is thawed some at room temp.

Delicious No-Bake Cheesecake

For the crust:
2 pkgs. graham crackers (2 out of 3 in 1 box)
2 sticks (1 cup) butter, melted
6 Tbls. powdered sugar

Crush graham crackers or run through a food processor to make into crumbs. Combine with melted butter and powdered sugar. Pat evenly into a 13" x 9" pan; set aside.

For the Filling:
2 pkgs. (8 ounces each) cream cheese, room temp
1 cup powdered sugar
8 ounces whipped cream*

Beat cheese with sugar till smooth. Fold in whipped cream. Spread evenly over the graham cracker crust. Cover well and freeze for 2-8 hours. Allow to sit out for 30-60 minutes to thaw.Spread choice of pie filling or real fruit filling over top. Serve.

For the Topping:
Use any canned pie filling you prefer, or use fresh fruits in season and sweeten with a bit of sugar, if needed, or make a fruit glaze to mix with fruit. This can also be left plain for a plain cheesecake.

Tips:
*The original called for 8 ounces of Cool Whip, but I like to use real whipped cream that you can
   make yourself or buy already made
*You can freeze this for up to 2 months in the freezer, just wait to add any topping when thawed
   and ready to serve.
*For the strawberries I put on my cheesecake and got rave reviews, all I did was to wash and slice up
  a pound of fresh strawberries, added a bit of sugar (maybe 1/4 cup) and allowed them to sit to make
  a syrup. Then I spread the strawberries with the syrup evenly over the cheesecake and it was done.

Wednesday, April 25, 2012

Lori's Fried Rice


Back in July of 1980, my friend, Sandy Mavis Koehler, called me and told me she needed to teach me how to make a fried rice recipe that a Korean friend of hers from work had taught her to make as it was absolutely delicious and addicting. A week or so later, she came over and we made the rice. YUM! I loved it! She was right! Delicious! Addicting!
The original recipe did not have peas in it, but celery chopped finely, and only maybe 5-6 slices of bacon. Over the years, I learned to make this the way I like it with the peas instead of celery (though both could be added), and I added more bacon. This recipe is a 'guesstimate' recipe as I may have the original written down somewhere, but I doubt it as Sandy gave me a 'guesstimate' recipe when she showed me how to make it.
I usually make double or more of this recipe when I am making it, depending on how many I am cooking for, and how much in leftovers I want for later use. My kids love this rice! It is one of their favorite side dishes. I think it is some of the best fried rice I've ever eaten and I think you will think so, too. It is a bit time consuming to make with all the steps, but so worth the effort. Do not be afraid to make this recipe your own by using the vegetables you like best. If you don't like frozen peas, don't use them. You could add celery, mushrooms, leeks, whatever you like to this recipe. It is very versatile to amendments. The bacon is crucial, as is the bacon grease. Don't skimp on either.

Lori's Fried Rice

2 cups water*
2 Herb Ox chicken bouillon cubes*
2 cups instant rice*
1/2 cup frozen peas
1/2 pound bacon, cooked, crumbled, grease reserved
1 onion, cut fine (minced)
1/2 cup green pepper
About 4-5 baby carrots, finely shredded
1 egg, scrambled with 1 tsp. water
3-4 Tbls. reserved bacon grease*
About 1 Tbls fermented soy sauce, or to taste*

Bring the water and bouillon cubes to a boil; add peas and bring to another boil. As soon as water boils again, add rice, stir, cover with tight fitting lid, and turn off heat. Set aside while you make other foods.
Fry bacon, reserving grease as you fry.
Meanwhile, chop (mince) onions and green pepper, and grate carrots; set aside.
Scramble egg in a skillet sprayed with a bit of Olive oil cooking spray. Remove egg and chop fine, using a fork to mince it up,  then place in a bowl till ready to use.
When bacon is done frying and has cooled, crumble or chop quite small.
Return 2-3 Tbls of bacon grease back to the skillet, then add the vegetables and saute for a few minutes until the vegetables begin to soften some. Add in the scrambled egg and bacon. Saute for a few minutes to heat everything up. Either add the rice to the skillet or the contents of skillet to rice (whichever pan is bigger), then stir well to combine ingredients. Add soy sauce and stir well, adding more as needed, to taste. Rice should be a nice brown color when there's been enough soy added.
Serve and enjoy!

* I use Herb Ox bouillon cubes as they have no added MSG.
*You can use chicken broth (homemade or canned) in place of bouillon.
*You can use long cooking rice in place of the Instant Rice, but it is chewier,
*You can use white or brown rice, though I like the taste of white best in this recipe.
*The bacon grease adds to the flavor and taste appeal of this recipe. You can use a bit more, if
  desired.
*You can use regular soy sauce (and I have when out of the fermented), but since soy sauce is not
  good for you unless it is fermented, it is best to use fermented. Can be found online for sale.