Monday, October 24, 2011

Lori's White Chicken Chili

                                                                            
I have to admit I am not a fan of this chili as I do not care for hominy, but Bob loves this soup as it is his favorite chili. I took an existing recipe I'd made from Taste of Home magazine and modified it to the way I wanted to make it. Bob liked it the way the original version was, but he loved the modifications I'd made. It is easy to put together, so don't let the list of ingredients scare you off. And you can have chili made within an hour or less with this recipe. Many people have had this and like it a lot. I hope you enjoy it, too. There are many variations you can make with this recipe to make it your own just by modifying this to fit your family's tastes. I have added one modification below that I sometimes make. This is a very thick and hearty soup. Enjoy!

Lori's White Chicken Chili

2 boneless skinless chicken breasts, cut into bite-sized pieces
1 medium onion, chopped
1 tablespoon extra virgin olive oil
4 cloves garlic, minced
1 can (14-1/2 ounces) chicken broth
1 can (15-1/2 ounces) white hominy, rinsed and drained
1 can (15 ounces) white kidney (cannellini beans), rinsed and drained
1 can (4 ounces each) chopped green chilies
1-4 Tbls. jalapeno peppers, minced (depending on how hot you want it)
1 Tbls. real butter
1 tsp. real sea salt (pink kind)
1 teaspoon ground cumin
1/2 tsp. ground chili powder
1/2 teaspoon dried oregano
1/4 teaspoon white or black pepper
1/8 to 1/4 teaspoon cayenne pepper
1 cup (4 ounces) Co-Jack cheese, grated
1 cup (8 ounces) sour cream
1/3 cup half-and-half cream or milk
1/4 cup finely chopped fresh cilantro
1 Tbls. dried parsley

In pot place olive oil , onion, and chicken; cook until chicken is no longer pink. Stir occasionally to get all sides of chicken cooked. Add garlic and cook about two minutes. Add chicken broth, hominy, beans, green chilies, jalapenos, and spices. Bring soup to a boil, then turn down heat and simmer for about 30 minutes. Add cheese, stir to blend and melt. Stir in sour cream; blend well. Stir in cream or milk. Stir in herbs and serve. You can garnish with a dollop of sour cream and cheese.

Variation: Cut up in small pieces and fry 1/2 pound smoky peppered bacon. With slotted spoon, remove bacon to paper towels to drain. Add onions and chicken to bacon grease in pan and cook as above. Add half the bacon to the soup as it is cooking. Add some chopped scallions to the soup (1-2 onions, chopped) five minutes before it is done. Garnish with dollop of sour cream, cheese, bacon, and scallions. This soup will have a smoky flavor from the bacon.

Wednesday, October 12, 2011

Macaroni and Cheese


There is nothing that says 'comfort' quite like homemade mac and cheese. I've been making this for at least 28 years and my kids always loved it. This is the basic recipe I was given, but I add extra cheese and milk to make it rich and creamy. I never measure this out so I cannot give you the exact recipe I make as I add as I want to as I am making it. This is delicious. Enjoy!

Macaroni and Cheese

8 ounces elbow macaroni*
2 1/2 cups milk
5 Tbls. unbleached flour
3 Tbls. butter
Salt and pepper, to taste
2 1/4 cups grated American cheese
1 1/2 cups grated Cheddar cheese
3/4 tsp. Worcestershire Sauce (optional)*

Cook macaroni according to package directions; drain.
In 2 quart sauce pan, melt the butter and blend in the flour; cook 1-2 minutes. Stir in milk and heat to almost boiling. Add salt and pepper. Cook milk till thickened, then add cheeses to melt.Stir till smooth. Add Worcestershire Sauce, if used. Pour over macaroni. Pour into a large baking dish and bake at 350F degrees for 20-25 minutes. If you like, you can add extra grated cheese to the top and put in oven till cheese is melted.
*I sometimes use Rotini noodles in place of the elbow macaroni.
*I do not use the Worcestershire Sauce as I don't like it, but many do.


Tuesday, October 11, 2011

Sandy's Texas Sheet Cake

                                                                                     
Who does not like Texas Sheet Cake? It is rich and delicious. This recipe came from a step-aunt of mine, Sandy Buery, who used to bring this to family gatherings. I am so glad I was able to get this recipe from her as she died earlier this year from Cancer. Sandy made some very tasty foods that our entire family enjoyed. Her recipe has now become mine as I've made it several times over the past few years.

Sandy's Texas Sheet Cake

Cake:
2 cups flour
2 cups sugar
2 sticks butter (half pound)*
4 Tbls. baking cocoa
1 cup water
1/2 cup buttermilk*
2 eggs, slightly beaten
1 tsp. baking soda
1 tsp. vanilla

Icing:
1 stick butter
1 Tbls. baking cocoa
6 Tbls. milk 3 1/2 cups powdered sugar
1 tsp. vanilla
1 cup chopped nuts

Cake:
Sift together the flour and sugar; set aside.
In saucepan, add 2 sticks butter, cocoa, and water; bring to a rapid boil, then pour over the sugar mixture; mix well. Add buttermilk, eggs, baking soda and vanilla. Blend well. Pour into a greased 17" x 11 3/4" cookie sheet (1" lip). Bake at 400F degrees for 20 minutes. About 5 minutes before done make icing.

Icing:
In a 2 qart sauce pan, melt the butter. Add the cocoa and milk and bring to a boil.. Remove from heat. Add the powdered sugar and vanilla; mix well. Stir in chopped nuts. Spread over hot cake. Allow to set up.

*Use only real butter.
*Either walnuts or pecans can be used.

Tuesday, September 27, 2011

Yummy "Stuffed" Potato Soup

                                                                       
Need I even say more about this soup? It is a variation on the traditional and popular "Twice-Baked" Potato Soup that most people make. I thought it too rich made completely with milk, and it did not have enough bacon, onions, or cheese to suit our family, so I modified the recipe to fit what we like. Everyone who tries this soup likes it as it is tasty, rich, full-flavored, and filling. It really hits the spot on a cold day. I like a good smoky bacon to use in this recipe as it really brings out the flavor. This is my husband's favorite soup as he asks for it on a regular basis~ at least once or so a month. I just made this a couple of weeks ago, and he thought he'd died and gone to heaven. Well, maybe he would not agree with this word picture, but he sure was one happy diner that night. I sure heard a lot of "Mmmm's" while he was eating!  He was also dipping pieces of freshly cut bread into the soup before he got his shower and sat down to eat.
This is delicious served with a Vienna or French Bread, real butter, and a salad.
Yes, this makes a large amount, and yes, it is a bit pricey to make, but it is so delicious that it will soon become a family favorite of yours. Don't be afraid to cut this recipe in half, but for us, it is good 'as is' since we eat on it for the next couple of days for lunch.

Yummy "Stuffed" Potato Soup

2 pounds bacon, fried crisp, then crumbled
4-5 pounds potatoes (any potatoes will do, but I use Russets), peeled and cut small
about 1/2 cup very thinly sliced carrots (1/16" wide or smaller)
about 1/2 cup very thinly sliced celery (1/16" wide or smaller)
64 ounces (half gallon) chicken broth (either store bought or homemade)
Sea salt and pepper, to taste
1 stick butter, plus 2 Tbls.
about 2/3 cup flour
About 4 cups milk
1 bunch (about 8) scallions (green onions), chopped
16 ounces sour cream
16 ounces grated Cheddar Cheese
A couple of pinches of turmeric (for color)
About 2 Tbls dried parsley

Fry up the bacon crisp, crumble it so it will be ready; set aside. Cut up your scallions while bacon is cooking; set aside.
Peel, wash, and chop potatoes into small pieces (will cook faster). Place in an 8 quart pan. Add sliced carrots and celery, then the broth. Add about a Tbls of butter so the pot will not boil over. You can also salt and pepper now so the salt cooks into the vegetables. Bring to a boil and cook till potatoes are soft. When soft, mash with a potato masher to desired fineness. .We like ours quite fine, but if you like chunks, then leave chunks, or as is.
In a 2 quart sauce pan, melt the butter and with a whisk stir in the flour to make a roux; cook for about 1 minute. Slowly add some milk, stirring constantly to keep it from being lumpy, then add to the still bubbling soup. Add remainder of the milk and continue to stir as it thickens. If it seems to thicken too much, then add a bit more milk. Stir in the scallions and allow to cook a few minutes, then stir in sour cream and blend well. Stir in cheese and stir till melted and blended into soup. Add a few pinches of turmeric, stirring to combine, until desired color is achieved. (I like a nice golden color without being too bold). This does not affect flavor of soup. Stir in bacon and parsley. Serve with buttered Vienna or French bread and a salad. Makes a full pot.
This can be garnished in bowls with a dollop of sour cream, a few sprinklings of scallions, and some grated Cheddar cheese.


Iowa Brownies

                                                                                                                                    
These are misnamed as they are more like a sheet cake than a true brownie, but wow, are these good! And so simple to whip up. I got this recipe out of the food section of my local paper back around 1983, and I've been making them ever since. These hit the spot when you want something decadent, chocolaty, and good. I've also taken these to many pot lucks, funerals, and to those with families whom I am cooking for because of a stay in the hospital or just had a baby. I've made these with and without walnuts, with pecans, and my favorite is with walnuts. If you are out of walnuts, do not despair as these are good anyway! Rich and delicious, a little goes a long way.

Iowa Brownies

1 stick (1/2 cup) real butter, softened
1 cup sugar
1 can (16 ounces) Hershey's syrup*
4 eggs
1 cup unbleached flour
1 cup chopped nuts (optional)
Icing, follows

Preheat oven to 350F degrees.
In large mixing bowl, cream butter and sugar. Beat in syrup, then eggs, one at a time, till well-incorporated. Beat in flour. Fold in nuts. Pour into a greased 10" x 15" jelly roll pan. Bake 25 minutes at 350F degrees. Do not over bake! Cool completely, then ice with the following.

Icing

1 stick (1/2 cup) real butter
1 1/2 cups sugar
1/3 cup evaporated milk*
1/2 cup semi-sweet chocolate chips
1/2 tsp. vanilla

In 2 quart sauce pan, add butter and melt over medium heat. Add sugar, milk, and chocolate chips. Bring to a boil and cook one minute. Stir in vanilla. Immediately pour over cake and allow to cool. Cut into squares to serve.

*I always buy my syrup in a large container and measure out 16 ounces on my kitchen scales. I also no longer buy Hershey's syrup as it contains HFCS, so I use Nestle's Syrup as it does not contain HFCS.
*I often substitute regular milk in place of the evaporated.

Cheesy Chicken Broccoli Casserole


This is a recipe I made last week when I wasn't sure what I wanted to make and I had some leftover fried chicken breasts I wanted to re-purpose and use up. I found a recipe online and modified it some for what I wanted, which means this is my recipe as I fine-tuned it to be what I wanted it to be. I still think it needs some fine-tuning as I want to make it more healthy, but for now, Bob said he likes it and I can make it again. That means it is a winner for him. This is a good dinner dish for your family, just add some salad and a hearty bread with butter, or it would be good to take to a pot luck as it feeds a lot of people. You can half this recipe. I didn't think to take a picture of the entire pan, but I did take a picture of my bowl before I dug into it to eat it! It didn't have enough broccoli as I only had a partial bag in the freezer, but this recipe below has the right amount.

Cheesy Chicken Broccoli Casserole

4 cups cooked chicken breasts, cut into bite-sized pieces
16 ounces noodles ( I used Rotini)
2 cans of cream of celery or cream of chicken soup*
1 cup sour cream
1 cup milk
12 ounces Cheddar cheese, grated, divided*
1 Tbls. dried onion
Sea salt and pepper, to taste
1- 2 oz. pimentos, drained
1 bag (16 ounce) frozen broccoli, thawed some*
1 sleeve Ritz crackers, crushed fine*
1 stick real butter, melted

Cut up chicken while waiting for water to boil.
Cook noodles according to package directions; drain.
In large bowl, combine soup, sour cream, milk, 8 ounces of the cheese, dried onion, salt and pepper. Add noodles and mix well. Blend in pimentos and broccoli till well incorporated. Pour into a 9" x 13" pan, spreading with a spoon or spatula to make it even all over.
Crush crackers and mix with butter till well covered. Sprinkle all over casserole.
Bake at 350 degreesF for 30-40 minutes. Remove from oven, sprinkle with remaining 4 ounces of cheese and bake for another minute or two until cheese is all melted. Let set up about 5 minutes before serving. Makes enough to serve 8-10 people.
To add another layer and dimension to the taste of this casserole, you could finely chop up onion, carrots, and celery. Green pepper, too, if you like. Also, cut up half a pound of bacon in small pieces and fry, along with diced vegetables until bacon is done, and vegetables are cooked and tender. Mix this in in place of the dried onions.

*Instead of the soup, you can make a comparable amount of thick white sauce using chicken broth in place of water or milk. You can also cook small pieces of celery in broth.
*I like Cheddar, but you can use any cheese you favor.
*You can use any frozen vegetables in this casserole. I prefer broccoli.
*You can replace the crackers with about 1 1/2 cups of bread crumbs, either plain or Italian, homemade or store-bought. Just make sure your bread crumbs come from bread with no HFCS or MSG in it.


Wednesday, August 10, 2011

One Pot Bean Dinner

It isn't quite cool enough to be thinking about this dish yet, but this is a great meal to have when it is beginning to cool in the fall. This recipe was printed in a church cook book where I used to attend church, and it is better than most similar recipes as it uses liquid smoke, giving this dish a depth of flavor lacking in other recipes. This is also a great dish to take to pot lucks. I like this best as a side dish. This is also great served over rice for a main meal.

One Pot Bean Dinner

1 pound ground chuck
1 cup chopped onion
1 pound bacon, cut into small pieces
1 can (16 ounce)  kidney beans, drained and rinsed
1 can (16 ounce) baby butter beans, drained
4 cans (16 ounces) pork and beans
1 cup Heinz Simply Ketchup
1/4 cup brown sugar
3 tablespoons white vinegar
1 Tablespoon liquid smoke
 sea salt and pepper, to taste

In skillet, brown hamburger and onions till brown; drain grease. Meanwhile, cut up bacon and fry in another skillet until done; drain grease.
Combine all ingredients into a 5-6 quart crock pot, stirring well to blend. Cook on low for 4-9 hours. Or you can combine in a Dutch oven and cook over low heat, stirring frequently so as not to burn, for 1-3 hours.


Lori's Baby Food Carrot Cake


Do not allow the name of this cake to turn you off. This is a delicious and easy cake that uses pureed baby food carrots for its base. Makes it much easier to use than having to grate your own carrots. Most recipes featuring baby food only call for cinnamon, but then the cake is just so-so, but with the addition of cloves it raises this cake above the rest. If you do not like cloves, leave them out. I make this cake 1-2 times per year as many in my family love it.

Lori's Baby Food Carrot Cake

1 cup olive oil*
2 cups sugar
4 eggs
3 (4 ounces each) baby food carrots
1 teaspoon vanilla
2 cups unbleached flour*
2 teaspoon baking soda
2 teaspoons baking powder
2 teaspoons ground cinnamon
1/2 teaspoon ground cloves
1/2 teaspoons sea salt
2/3 cup raisins (optional)
2/3 cup chopped nuts (optional)
Cream Cheese frosting, follows

Preheat oven to 350F degrees.
In large bowl, combine oil, sugar, and eggs; beat well. Add baby food and vanilla; mix. In smaller bowl, combine flour, baking soda, baking powder, spices, and salt; add to the batter and beat well. If using raisins and/or nuts, then fold in. Grease a Bundt pan or a 15" x 10" pan and pour in batter. Bake at 350 degrees for 45-60 minutes, till tests done with a toothpick. Let cool in pan 10 minutes, then invert onto cooling rack or onto serving tray. When cooled completely, frost.
* Original recipe uses vegetable oil, but it is not healthy for you.
*You can use half whole wheat for the flour.
* 1/4 teaspoon nutmeg can also be added.

Cream Cheese Frosting

8 ounces cream cheese, room temperature
1 stick (1/2 cup) butter, softened
1 teaspoon vanilla
1 pound powdered sugar, sifted
1-2 Tbls of milk

In mixing bowl, combine the cheese, butter, and vanilla; beat till well mixed. Add the sugar and beat till creamy and smooth. Add just enough milk to make a good spreading consistency. Start with 1 Tbls and only add more if you need to. Refrigerate or freeze any leftovers.

Sour Cream Coffee Cake


This recipe can be found in most any cook book, but it is so easy and delicious. My family loves it. It is easily put together and cooks up beautifully. This is a picture of the bread after about half of it was eaten; not a great picture, but an accurate one that shows that this cake does not last long.


Sour Cream Coffee Cake

1 teaspoon cinnamon
1/2 cup sugar
1/2 cup (1 stick) butter, softened
1 cup sugar
2 large eggs
1 teaspoon vanilla
1 cup sour cream
2 cups flour
1 teaspoon baking soda
1 teaspoon baking powder

Preheat oven to 350F degrees.
In small bowl, combine the cinnamon and 1/2 cup sugar; set aside.
In large mixing bowl, cream butter and 1 cup sugar. Beat in eggs, vanilla, and sour cream.
In medium bowl, combine flour, baking soda, and baking powder. Add to the creamed batter and beat for 3 minutes. Grease a Bundt pan. Pour half of the batter into pan, smoothing out with a spoon. Sprinkle 3/4 of cinnamon-sugar mixture over batter. Add remaining batter, smooth out with a spoon and then sprinkle on remaining cinnamon-sugar mixture. Bake at 350 degrees for 60-65 minutes until cake tests done with a toothpick.Leave in pan for 10 minutes, then invert onto serving dish to cool. Slice into 12-16 pieces. This freezes well.

*Nuts can be added to this, especially popular is pecans. Add 1/2 cup to 1 cup chopped nuts, if desired.

Zucchini Cake

                                                                                                                                                         
I got this recipe from a friend back in 1982. It is a delicious spice-style cake. It can be frosted with the sour cream frosting, it can be left plain, or sprinkled with powdered sugar.

Zucchini Cake

2 1/4 cups sugar
1 cup olive oil
1 Tablespoons vanilla
3 eggs
2 cups peeled and grated zucchini, packed*
3 cups sifted unbleached flour
1 teaspoon baking powder
1 teaspoon baking soda
1 Tablespoon cinnamon
1/2 teaspoon cloves
1/4 teaspoon nutmeg
1 cup raisins (optional)
1 cup nuts (optional)

Sour Cream Frosting:

2 1/2 cups powdered sugar
1/3 cup sour cream, room temperature
1/4 cup butter, softened
3/4 teaspoon vanilla
For frosting:
Combine all ingredients and beat for 2 minutes until creamy and spreadable.

Preheat oven to 350F degrees.
In large bowl, combine sugar, oil, vanilla, and eggs. In a medium bowl, combine flour, baking powder, cinnamon, cloves, and nutmeg. Add dry ingredients to batter and mix well. Stir in raisins and nuts, if used. Pour into a greased Bundt pan and bake at 350 degrees for 50-60 minutes, till tests done with a toothpick. Let cool in pan for 10 minutes before inverting onto cooling rack. Sprinkle with powdered sugar or frost with the Sour Cream Frosting. Keep leftovers covered in refrigerator. Freezes well.
*This can be made in two 8" x 4" pans, or into muffins, or into small loaf pans. You can frost these items or leave them as is.*Zucchini can be chunked and then placed in a blender or food processor and pureed before adding to recipe if you do not want to be able to see the veggie in your cake.

Chocolate Zucchini Bread

                                                                
I was looking for a way to use up the zucchini we had from our garden and came across this recipe. I have modified it some to make it the way I like it. It is a good way to add some veggies to your family's menu, and it is a pretty good bread. This recipe is not the original as I have changed some of the ingredients to make it the way I like it.

Chocolate Zucchini Bread

3 eggs
1 cup olive oil
1/2 cup applesauce
2 cups sugar (or you can use Rapadura)
1 Tablespoon vanilla
2 cups zucchini, peeled and grated (about 1 medium)
2 1/2 cups unbleached flour (or you can use half wheat with this)
2/3 cup baking cocoa
1/2 teaspoon real sea salt
1 teaspoon baking soda
1 teaspoon cinnamon (optional)
1/4 teaspoon aluminum-free baking powder
1/2 cup chocolate chips
1/2 cup chopped walnuts or pecans

Preheat oven to 350F degrees.
In a medium bowl, combine the flour, cocoa, salt, baking soda, baking powder, and cinnamon, if used.
In a large mixing bowl, beat eggs, olive oil, applesauce, sugar, and vanilla together. Stir in zucchini. Add the dry ingredients and blend well. Stir in chocolate chips and nuts. Pour into two 8" x 4"  greased pans. Bake at 350 degrees for 40 minutes, or until toothpick inserted in middle comes out clean. Allow to rest for 5 minutes before turning out onto a wire rack to cool. Once cooled, wrap in plastic wrap or foil and allow to set overnight or for 8 hours. This freezes well.
*This can also be made into muffins, a Bundt pan, a 13" x 9" pan, or smaller loaf pans. Adjust cooking times.


Cheddar Garlic Biscuits from 'Bisquik-Style Mix

                                                
Cheddar Garlic Biscuits from Bisquick-Style Mix

1 cup mix (see previous post)
1/3 cup Cheddar cheese
1/3 cup milk
2 Tablespoons real butter, melted
1/8-1/4 teaspoon garlic salt*

Preheat oven to 450F degrees.
In a small bowl, measure out 1 cup mix along with the cheese and mix together, Stir in milk. Drop by tablespoons onto a lightly greased cookie sheet. Bake at 450 degrees for 8-10 minutes. Melt the butter and mix in the garlic salt; brush on hot biscuits as soon as you take them from oven. This recipe can be easily doubled.
*You can use 1/8 teaspoon garlic powder instead of the garlic salt.

Homemade"Bisquick"-Style Biscuit Mix

                                                         
I believe I got this recipe from a 'Hints From Heloise' article in the newspaper back in the mid to late 1970's. I also know I was making and using this around 1976 as I thought it was almost as good as the real boxed version. I am going to post the recipe 'as is' and then post it a more healthy way. I will also post a few tips.
I used to make biscuits, coffeecake, and pancakes from this mix, along with other recipes I would come across on the back of the Bisquick box, except I would use this mix. One year, when I was particularly broke, I gave some of this mix doled out in Mason jars to family members, with a recipe card attached for making biscuits . They may not have appreciated it much, but it was all I had to give at the time. I thought it made a nice gift since it was so practical.
In these hard economic times reminiscent of the 1970's recession, knowing how to make much of your own 'convenience' foods is a big help. I hope this recipe is a help to you.

Homemade"Bisquick"-Style Biscuit Mix
*Original version:
8 cups flour
1/3 cup baking powder
2 teaspoons salt
8 teaspoons sugar
1 cup shortening

Mix all dry ingredients together, then blend in shortening and mix until of a fine consistency. Put in container and seal. This will keep for months in the refrigerator. For biscuits just add 1/3 cup milk to every cup of mix. drop or roll out. Bake at 425 degrees until done, about 15-20 minutes.

Homemade"Bisquick"-Style Biscuit Mix
*Updated healthier version:

8 cups unbleached flour (or half unbleached, half wheat for those of you who like wheat)
1/3 cup aluminum-free baking powder
2 teaspoons real sea salt (pink)
8 teaspoons sugar or Rapadura (see Tropical Traditions website for more info)
1 cup organic palm shortening (see Tropical Traditions website for more info)

Mix all dry ingredients together, then blend in shortening and mix until of a fine consistency. Put in container and seal. This will keep for months in the refrigerator. For biscuits just add 1/3 cup milk to every cup of mix. drop or roll out. Bake at 425 degrees until done, about 15-20 minutes.

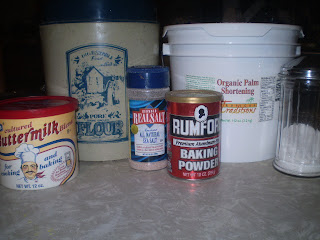
*Tips: To make it more like the boxed version, add 1/2 cup to 1 cup of buttermilk powder to the dry ingredients. Saco brand makes a good powdered buttermilk. You can find this in the baking aisle of most groceries. (See photo above for product.)
Storing it in a glass container in the refrigerator will make it last for many months as it will not go rancid, but when you want to use it, set out your measured amount and allow to thaw some for easier handling. You can use a plastic container, but I try to use glass as much as possible.


Tuesday, June 21, 2011

Homemade Butter


While we're on the subject of homemade cornbread, then we will want a delicious homemade butter made from raw cow's milk. I belong to a herdshare and get 2 gallons of raw milk each week. The rich cream from my Jersey cow rises to the top and I am then able to skim it off. When I want to make butter, I put the milk in wide-mouth Mason jars for ease of skimming the cream. Jerseys give good, rich milk, with yellowish milk in the early spring/summer. The rich butter fat is very good for you. The girls hate it when I make butter because they like the richness of the milk with the cream left intact.

Homemade Butter

Wait a few days after milking to skim your cream. The older the cream, the easier it is to make into butter. Because I like sweet cream butter, I use the cream two to three days after the cow has been milked.
Skim all the cream you can from the top of your milk. With two gallons of milk I easily get around a half pound of butter. I cheat and use my Kitchen-Aid mixer, which does all the work for me.
Place the cream in the mixing bowl and place the beater in the bowl. Turn on to medium and allow to whip the cream. This process takes about 1 hour or so before butter appears. About a half hour into beating, you will end up with whipped cream. If you want the whipped cream, add some powdered sugar, to taste, and some vanilla, then remove and use with your desserts. If you want butter, keep beating. You will see small butter pieces start to form on sides of bowl, with a rubber spatula, push these back into the bowl. You will still have another 10-20 minutes before you have butter. The butter will form all at once and then the buttermilk will begin to slosh out of the bowl, so watch carefully.
Once the butter is formed, turn off the mixer and scrape all butter out of the beater into a small glass bowl like you see above. Once all butter is formed and into bowl, pat together and begin to run under cold water so you can get all the milk out of the butter. If you don't get this out your butter will go rancid much faster.
The butter actually gets similar to putty under the water and I am able to use my hands to squeeze all the remaining milk from my butter. Place back in bowl, add some real sea salt, mix in well, and wrap well with plastic wrap. You can make it into a ball, a long cigar shape as I did above, or in a mold. Use like you would any other butter. There are special containers you can buy where the butter stays in water which extends the life of the butter. Because I use raw cream to make my butter, I keep it in the refrigerator.
The color is naturally very golden as grass-fed cow's milk is high in beta-carotene, as well as other vitamins and minerals.


Yankee Cornbread

                                                                                         
We Yanks like our cornbread sweet and cake-like. I don't like southern cornbread as it is not sweet and is too dry for my tastes. I like the yellow cornmeal best, but feel free to try this with white cornmeal, though I think you will end up with a drier version. I have made this with organic corn meal that is very rustic, and though I like it, most kids won't as it is a coarse meal that is kind of chewy in places. If you want to avoid GMO corn, then you must use organic meal. This is a delicious corn bread that is every bit as good or better than the kind that comes in a box. I've been making this recipe for more than 25 years. I found the original recipe in the Columbus Dispatch Food Section, but then I modified it to fit what we like. The above picture is a cornbread made with organic corn meal. I bought the meal from Ashery Farms in Heath, Ohio.

Yankee Cornbread

1 cup unbleached white flour*
1 cup cornmeal, organic, if possible
1/2 cup white sugar
4 teaspoons baking powder
dash real sea salt (pink kind)*
1 cup milk
2 eggs
1/4 cup, plus 1 Tbls. organic palm shortening, melted*

Preheat oven to 425 degrees.
Sift together dry ingredients and place in medium mixing bowl.
Combine milk, eggs, and shortening and beat well.
Add the egg mixture ot the dry mixture and blend just till moistened (don't over mix).
With palm shortening, grease a 9" x 9" square pan. Pour batter into pan, levelling top.
Bake at 425 degrees for 20-25 minutes, or till golden brown and a toothpick comes out clean,
Serve hot with plenty of real butter.
*You could use whole wheat flour, if you'd like, but you'll get a different taste.
*We use Redmond's Real Salt, a real sea salt that is pink and has trace minerals in it.
*I use organic palm shortening in place of vegetable shortening as it is a much healthier choice. I buy my palm shortening from Tropical Traditions. You can find them on the web.


Ham and Pinto Bean Soup

                                                                        
I know this is more for a fall or winter meal, but it is so good that I want to go ahead and post it. A year and a half ago I had leftover ham from Christmas and wanted to use it up. What to make? So I made up this soup that was so very delicious. I told Bob I wasn't sure if he'd like it, but on the very first bite he involuntarily said, "Mmmm..." and loved it. It was really good. I think I wrote it down somewhere, but I  think I can remember how I made it. The addition of the cumin and chili powder give it a bit of a 'chili' taste, but this is more subtle. One chilly night try this as you will love it. I served this with homemade cornbread with lots of real butter.

Ham and Pinto Bean Soup

1/4 to 1/2 pound smoky, thick cut bacon*
1 medium onion or shallots, chopped
2-4 cloves of garlic, minced
1/2 green pepper, chopped
2 boxes (32 oz.) organic chicken stock or broth*
4 cans (15 oz) pinto beans, drained and rinsed*
1 teaspoon ground cumin
1/2 teaspoon  chili powder
pepper, to taste
Leftover ham cut into bite-sized pieces (I used at least 2 pounds ham)


Cut bacon into bite-sized pieces and fry up in a Dutch oven. When bacon is almost done, add onions and green peppers and saute till bacon is done and onions are becoming clear. Add garlic and cook another minute or two. Add the boxes of chicken broth and the 4 cans of pintos; bring to a boil. Add the spices, turn down heat, and simmer for a few minutes. Add the ham and allow to simmer for a half hour to combine flavors. Serve with chopped scallions and corn bread. You can also add grated Co-Jack cheese, if desired.

*Try to make sure your bacon is not too fatty as you will be using the grease for frying vegetables and as part of the flavor of the soup. I used a sassafrass smoked bacon that was thick-cut.
*You can use your own homemade stock or broth.
*You can make your own 1 pound package of beans from scratch, just start the night before as you will need to soak the beans before cooking them.

Blender Pineapple Jam

                                                            
Blender Pineapple Jam

1 envelope unflavored gelatin (Knox or store brand)
2 Tbls. water or apple juice
1 can (20 ounces) crushed pineapple in juice
sugar, to taste*

Sprinkle gelatin on cold water or juice in blender or food processor; wait one minute to soften. Drain pineapple, reserving juice. Bring juic to a boil and add to gelatin in blender. Cover and blend until gelatin granules dissolve (scrape down sides of blender). Add pineapple, cover and blend till smooth. Sweeten to taste. Pour into 3 hot, sterilized half pint jars, add lids and store in fridge after it cools. It will set up while in refrigerator.
You could turn these jars upside down for 5 minutes to seal, then right side up, if you like.
Makes about 3 cups.
*Original recipe said to sweeten with artificial sweetener or sugar, and I am using sugar as it is a healthier choice.


Violet Jam

                                                                        
Violet Jam

1 cup firmly packed violet blossoms
1 ½ cups water, divided*
Juice of one medium lemon*
2 ½ cups sugar
1 pkg (3 oz) powdered pectin

In an electric blender or food processor, blend 3/4 cup of water, the lemon juice and the violet blossoms until the mixture resembles a smooth paste. Slowly add 2 1/2 cups of sugar and blend until dissolved. In a small saucepan stir the powdered pectin into 3/4 cup of water and boil for one minute. Pour into the violet blossom mixture and blend about one minute. Quickly pour into small sterilized glass jars and seal. After the jam has cooled, keep it in the refrigerator for three weeks or store it for up to a year in the freezer.

Tips:
*The use of spring or distilled water would be better than tap water.
*Make sure you ream a fresh lemon so you use real lemon juice.


Slow-Cooker Apple Butter

                                                                      
Slow-Cooker Apple Butter

10 cups apples, sliced
1 pound brown sugar
4 1/2 teaspoons ground cinnamon
2 1/4 teaspoons ground cloves
1 1/2 teaspoons ground allspice

Combine all ingredients in a slow cooker and stir well. Cook on high for an hour, then on low for 6 1/2 to 7 hours. Take lid off the last half hour. Stir occasionally while cooking to mix ingredients. Refrigerate or freeze. To can, pour into hot sterilized jars, cap, seal, process 10 minutes in boiling water bath.


Tomato Spread

                                                                          
Soon our tomatoes will be coming ripe and this seems an easy recipe to make from the excess.


Tomato Spread

6 cups peeled and chunked tomatoes
5 1/2 cups sugar
1 cinnamon stick
1 tsp. ground ginger
1 lemon sliced, very thin (use a kitchen mandolin for even slices)

Combine tomatoes and sugar in a large saucepan. Bring to a boil, watching constantly. Reduce heat to a simmer and add spices and lemon. Cook 2 hours, watching and stirring frequently. When reduced by half, it is done. Skim foam. Pour into hot sterilized half pint jars, leaving 1/4" head room, cap and turn upside down for 5 minutes, then right side up. Let cool.


Onion Jelly

                                                                  
Onion Jelly


2 pounds sweet onions, chopped fine
2 cups water
3/4 cup white vinegar
1 pkg. powdered pectin (1 3/4 oz)
5 1/2 cups sugar

Chop onions very small (mince). Combine onions and water in large saucepan; bring to a boil. Remove from heat and cool. Pour mixture through a large wire mesh strainer lined with a wet cheesecloth into a 4 cup measure. Discard pulp. Add water to onion juice to equal 3 cups, if necessary. Combine onion juice, vinegar, and pectin in a large saucepan; bring to a boil, stirring constantly. Add sugar and return to a boil, stirring constantly, and boil for 2 minutes. Remove from heat and skim off foam. Quickly pour hot mixture into hot sterilized jelly jars, within 1/4" of top. Wipe off rims, cap and seal. Turn upside down for 5 minutes or process in boiling water bath for 5 minutes. Makes 7 half pints (8 ounces each).


Mulberry Jelly

                                                                                                                                                      
Some of you may have mulberries or access to them and may want to make some jelly from them. The berries are usually free for the picking. Start this recipe the night before.

Mulberry Jelly

1 pound ripe mulberries (make sure they are not buggy!)
1 cooking apple, chopped*  (gala, granny Smith, golden delicious, etc.)
1/2 cup water
Sugar

Mix together the mulberries, apple, and water in a large saucepan. Simmer, covered for about 20 minutes, or until berries are soft. Pour mixture into a jelly bag and leave to drip for 12 hours. Measure juice and pour into clean saucepan. For every 2 1/2 cups juice, use 1 pound sugar. Add sugar to juice and cook, stirring constantly. Bring to a boil and boil rapidly until jelly has reached the setting point, about 10 minutes. Skim jelly and pour into sterilized jars, cap, seal, and turn upside down for 5 minutes, then right side up again. OR process for 5 minutes in a boiling water bath.
*The apple is the pectin used in this recipe.


Corn Cob Jelly

                                                                  
Corn Cob Jelly

Here's an old-fashioned jelly where our ancestors allowed nothing to go to waste. I'm sure a farmer in your area would give you some old corn cobs.

12 dried corn cobs
3 pints water (48 ounces)
1 pkg. powdered pectin
3 cups sugar
1 Tbls. fresh lemon juice

Use 12 ears dried field corn cobs. Take off all kernels. Rinse well to get off all chaff. Break them in half and put into a pan with water. Boil gently for 30 minutes. Strain juice through a wet cloth (must be wet cloth!).Measure juice to get 3 cups juice. If you must, add enough water to make that amount. To juice add pectin. bring to a boil. Add sugar and heat until sugar dissolves. Boil again for 1 minute or until mixture starts to jell when you lift mixture up with a spoon. It might take another minute of cooking. Add lemon juice. Skim off foam, pour into hot sterilized jars and seal. Process 10 minutes in a boiling water bath or turn upside down for 5 minutes then right side up.


Cantaloupe Preserves


This is another recipe that needs to be started the night before.

Cantaloupe Preserves

2 pounds firm, ripe fruit
4 cups sugar
Juice of one lemon

Peel cantaloupe and cut into thin slices 1" long. Mix sugar with fruit and lt sit all night in a cool place. Add lemon juice and cook until clear. Pour into hot and sterilized jars. Seal and turn upside down for 5 minutes or process for 5 minutes in boiling water bath. Cool, label, and store.


Sun Preserves


Sun Preserves*

This recipe needs to be started the night before.
Add 1 quart sugar to 1 quart strawberries. Cover and let stand overnight in a cool place. In morning, bring to a boil and cook 8 minutes. Pour into a large platter (use a large meat platter or dish) and cover closely with a piece of glass. Set in sun till juice thickens and gels. Cool completely and seal in jars. Keep in refrigerator.

* I got this recipe out of the Columbus Dispatch Food section around 31-37 years ago and copied it verbatim.
I've not ever made this, mainly because I've never had a piece of glass to try this with. Make sure the glass you use does not have sharp edges. We have a glass company on other side of town and maybe next year I will buy a piece and try this recipe. I've read that these taste even better than conventionally made preserves or jam.


Queen Anne's Lace Jelly

                                                                         
I made this jelly about 15 years ago; some liked it and some did not. It was reminiscent of quince jelly to me, which I don't care for, but if you like quince, this may be for you. I am sure there are some good medicinal qualities to this jelly, but enjoy it for its simplicity and the fact that the flowers are free for the picking. Try to pick your flowers (no matter what kind you use) far from the road.

Queen Anne's Lace Jelly

2 cups very firmly packed Queen Anne's Lace flowers cut from stems (or violet, lilac, rose petal, milkweed, clover, elderberry, dandelion, carnation, peony or any edible sweet smelling flowers)
4 3/4 cups boiling water
3 1/2 cups sugar ( 1 1/2 lbs., divided)
1 pkg. Sure-Jel light pectin (I used regular)
4 1/2 Tbls. freshly strained lemon juice

Slosh flowers through cold water to remove any bugs; let sit about 15 minutes to remove them all. You will find bugs!
Place flowers in a pot and cover with boiling water and allow to steep for 15-20 minutes; strain. (You are basically making tea.)
Measure 4 1/2 cups strained infusion into a large kettle. Mix 1/4 cup sugar with pectin and stir into kettle. Bring to a full rolling boil; immediately stir in remaining sugar and boil 1 minute.Remove from heat. Stir in lemon juice. Skim foam from top of jelly with a metal spoon and immediately pour into ho, clean, sterilized jelly jars. Wipe off tops, cover with lids and bands and turn upside down for 5 minutes, then right side up and allow to sit for 24 hours before moving. Makes 6 cups (Makes six 8 ounce jars, also known as half pints.)

The original recipe said to place in jars and seal and when cool to refrigerate, but I treated them like other jellies and jam and sealed them by turning them over for 5 minutes which causes the lids to seal. If you are not comfortable with this, you can place in a boiling water bath for 5-10 minutes to seal.
*Important! Make sure your jars are sterilized before you seal them!!! No one wants to get botulism!

Friday, June 10, 2011

Lori's Fettuccine Alfredo With Chicken and Broccoli


Mmm....one of my favorite dishes to have when I am craving something rich and creamy. Traditionally, this dish is made with heavy cream, but it separates too easily and so I prefer to work with milk.You can make this without the meat or without the broccoli, or with the broccoli and without the meat. However you make this, it is sure to please.

Lori's Fettuccine Alfredo With Chicken and Broccoli

4-6 grilled chicken breasts
steamed broccoli, whole spears or pieces
1 pound (16 oz) fettuccine noodles
1/2 cup butter
4-5 Tbls. unbleached flour
1-2 cloves garlic, minced*
4 cups milk
Real sea salt and pepper, to taste
about 1/8 tsp. turmeric
1-2 Tbls. dried or fresh parsley
4-5 cups grated Parmesan cheese*
Freshly grated Parmesan cheese*
 
Grill 4-6 boneless, skinless chicken breasts, seasoned to taste; set aside to keep warm.
Steam the broccoli just till fork tender. Place in a pan, toss with some butter; set aside to stay warm.
Cook noodles according to pkg. directions.
Meanwhile, melt butter in a heavy 3 quart pan. Stir in flour to make a roux and allow to cook for 1-2 minutes, without browning. Stir in garlic and allow to cook with the flour. Slowly add the milk and stir till hot, bubbly, and thickened. Do not scorch. Add salt and pepper, to taste. Stir in turmeric (for color) and blend well. Stir in parlsey and grated Parmesan cheese. Add a bit more milk if too thick, heat thoroughly.
Place cooked noodles on plate, top with Alfredo sauce, chicken, broccoli, and grate some fresh Parmesan over top. If only using noodles, just grate some fresh Parmesan cheese over top.
You can combine noodles and cheese sauce if you like, but we tend to like ours added separately.
This will feed 6 or more people. You can half this recipe.
 
*Garlic salt or powder can be used instead. If you use garlic salt, do not add extra salt to dish.
*You can use Kraft grated Parmesan in a can, but we buy a 5 pound bag of cheese at GFS and freeze it so we can use it as we want it as we use Parmesan cheese in many dishes, including soups.
*Fresh Parmesan is different in taste and texture from the canned Parmesan. Both add to this dish.
*If you like mushrooms, these can be added to this dish for an extra flavor component. Just cook fresh mushrooms separately, then add to milk mixture while thickening.

Lori's 4 Cheese Baked Ziti


I love the cheesy topping on baked ziti. This recipe is reminiscent of lasagne without the layers, and I think it has an entirely different taste, though I make my cheese layer basically the same way for both. This is delicious and makes a large amount. You can half this recipe or place in two pans, making one for dinner and freezing the other to have for a later date. Frozen meals stay good in the freezer for up to 2 months. Just give frozen meals 2-3 hours to bake. This is another one of those dishes that is great for pot lucks.

Lori's 4 Cheese Baked Ziti

1 pound box (16 oz) mini penne rigate (or you can use a traditional ziti noodle)
2 pounds ground chuck*
1 onion, chopped
2-4 cloves garlic, minced, depending on taste
Real sea salt and pepper, to taste
about 66 ounces spaghetti sauce (about 2 1/2 jars)*
15 oz ricotta cheese*
about 4 ounces Cheddar cheese*
about 1- 1 1/4 cups Parmesan cheese
16 ounces (1 lb) Mozzarella cheese, divided
1 egg
1/2 tsp. garlic salt
pepper, to taste
1 Tbls. dried parsley flakes or fresh parsley, chopped
milk
Olive oil cooking spray

                                                                                                                                  Bake at 350 degrees.
Place pot of water on to boil; cook noodles according to pkg. directions.
Meanwhile, in a Dutch oven, brown ground chuck with onions. garlic, salt, and pepper; drain grease. Return to pot and add spaghetti sauce. Allow to simmer till ready to use.
While meat is cooking, combine cheeses, egg, spices, and enough milk to make creamy, about 1/4-1/3 cup or so. Mix well.
Combine noodles and meat sauce and blend well. Place in a 15" x 10" pan. Spoon cheese mixture over top and spread around lightly. Take a large piece of foil and spray with olive oil cooking spray; cover casserole. Bake at 350 degrees for about 45-60 minutes, till cheese is set and casserole is hot and bubbly. Remove foil and sprinkle with remaining cheese. Return to oven to melt over top. Allow casserole to sit for 10-15 minutes so cheese will set up before cutting into. Makes enough to serve 8-10, possibly more if served with salad and bread.

*You can use less meat, but we like lots of meat. If using less meat you can cut down some on spaghetti sauce.
*Spaghetti sauce used to come in 32 ounce quart jars. Spaghetti sauce now comes in 24 oz to 26 oz jars. I use the Meijer brand spaghetti sauce and sometimes Bertolli or Ragu. I mix the brands. I use about 2 1/2 jars of sauce in this dish and freeze the remainder in its original jar till needed for another dish.
*I never measure the Cheddar cheese I add, I just dump in what looks right.
*Make sure you get a good ricotta cheese, one not made with a lot of added ingredients. Miceli's is good as it only contains milk, whey, cream, vinegar, and salt. Other brands contain guar gum, modified corn starch, and preservatives.
*You can also add green pepper and mushrooms to this recipe, if you'd like.


Lori's Pot Roast with Gravy

                                                             
Many people love a good pot roast with gravy, especially on a cold fall or winter day. I like to use a chuck roast or an arm roast. Arm roasts are harder to find unless you go to a meat shop or a small town grocery. I haven't seen one for years in any of the chain grocery stores. There is a small grocery in Thornville, OH which still sells arm roasts, and I stop there once in awhile and buy one. Either cuts work well. You could use a round cut, but the taste and texture is not the same, and not as good as it will be much drier.

Lori's Pot Roast with Gravy

Olive oil cooking spray
1 good sized roast, about 3-4 pounds (smaller, if you have a small family or don't want leftovers)
season salt
pepper
1-2 onions, sliced into rings
2-3 MSG-free bouillon beef cubes (Herb-Ox is a good choice)
potatoes, quartered*
1 pound of carrots, sliced
sliced or diced fresh mushrooms, if desired*
unbleached flour
water
About 1/2 Tbls. parsley flakes, fresh or dried, optional
1-2 small sprigs of fresh thyme, optional

In a large cast iron skillet or Dutch Oven, place pot over heat and spray with olive oil spray. Once pan is hot, add meat and sear well on both sides. I usually place fatty side down so some of the fat cooks off helping meat to not stick. Once seared, remove from heat. Sprinkle with season salt and pepper, to taste. Add onions to the top of roast, covering all over. Add bouillon cubes to sides of pan, and add 2 cups of water. Put on lid and place in 325 degree oven. Allow to cook for 4 hours, adding more water, as needed so it does not go dry.You want to maintain at least 1 1/2 cups of water by time done so you have some for gravy.
About one hour before meat is done, add mushrooms, if used,  potatoes and carrots over top of meat and around meat. Salt and pepper the vegetables, to taste. Cover and bake an additional 45-60 minutes, till vegetables are fork tender and done. Remove vegetables if you want to make gravy. Remove meat to a platter.
Place about 1/4 cup unbleached flour in a glass jar, add some water, and bout 1/2 cup, and shake well. Make sure no lumps are in water. Place pot on burner and turn to medium heat. When water begins to boil, add flour mixture, stirring constantly, until to desired thickness. Stir in parsley and some fresh thyme, if desired.

*We usually have mashed potatoes, though we sometimes make potatoes like this with the roast.
*I hate mushrooms so I usually cook some in butter and add them to a separate pan with some gravy for Bob.

Lori's Johnny Marzetti

                                                                                                                           
I love trivia, and the story of Johnny Marzetti is an interesting one, besides being an iconic dish created right here in Columbus, Ohio. I got this information from the Ohio History Central site:

"Ohioan Teresa Marzetti was the first person to serve the casserole Johnny Marzetti in a restaurant.
In 1896, Italian immigrant Marzetti arrived in the United States of America. That same year, Marzetti established an Italian restaurant in Columbus, Ohio on Broad Street. This restaurant closed in 1942, but another restaurant, which had opened in 1919, remained in operation until 1972, when Teresa Marzetti died. Before opening the original restaurant, Marzetti wrote, "We will start a new place and serve good food. At a profit if we can, at a loss if we must, but we will serve good food."
One of the dishes that Marzetti offered her customers became known as Johnny Marzetti, which was named for Teresa Marzetti's brother-in-law. A baked casserole, the dish included ground beef, cheese, tomato sauce, and noodles. It is unclear when Marzetti's restaurant first offered the dish, but by the 1920s, it had become popular across Ohio and the Midwest. This was primarily due to the ease of preparation and the tastiness of Johnny Marzetti."

From the 1940's through the 1990's most schools in central Ohio had Johnny Marzetti on the menu at least once a month. It was always a favorite dish of most school kids. School cooks almost always made their dish using egg noodles, which is what I prefer. Most all families in central Ohio have a variation on this dish as it comes in many styles, most notable is that many people have traditionally made this dish with elbow macaroni. When I was growing up, my mom made this dish with elbow macaroni, and so did most people I knew. My late ex-mother-in-law, Letha Huber, used to brown ground beef with onions, add cooked elbow macaroni, cans of stewed tomatoes, and enough tomato juice to keep it from being dry. We all loved it.

The only Johnny Marzetti I've had that I do not like in any way is the one made with canned tomato soup. It is a disgusting creation, and I do not know why people cook with tomato soup when diced or stewed tomatoes make for a more tasty and appetizing dish. But however you make yours, make sure you try this recipe that I created over the years as I tried to make a tasty and delicious casserole that we would crave. And crave we do as this is the quintessential comfort food.

Lori's Johnny Marzetti

2 pounds ground chuck*
1 onion, chopped
about 1/4- 1/2 cup green pepper, diced*
2-4 minced garlic cloves*
Real sea salt (pink) and pepper, to taste*
1 can (15 oz) diced tomatoes, undrained
3 (cans) 15 oz  tomato sauce, plus 1 8 oz. can*
2 tablespoons brown sugar, to cut acid from tomatoes
1 16 oz bag medium egg noodles ( I use Meijer brand)
16 oz (1 lb.) Cheddar cheese, grated*
Olive oil cooking spray*

Preheat oven to 350 degrees.
Put large pot of water on to boil for the noodles. When ready, cook noodles according to pkg. directions; drain and set aside if not ready.
Meanwhile, brown beef in a 6 quart dutch oven, along with onion, green peppers, garlic, salt and pepper; drain grease when done. Stir in tomatoes, tomato sauce, and brown sugar; let simmer till noodles are ready.
Combine noodles and meat sauce in large pot and blend well. Stir in grated cheese. Pour into a 15" x 10" casserole dish. Spray some foil with cooking spray and cover casserole. Bake at 350 degrees for 30-35 minutes. Remove from oven, remove foil, sprinkle more cheese over top and return to oven till cheese is melted. Remove from oven and allow to set for 5-10 minutes before serving to give cheese a chance to set up some. This makes a large amount that will feed 8-10 people, maybe a bit more, depending on appetites. You can halve this recipe and bake in a smaller pan. This is also great for pot lucks or as funeral food.

*I use ground chuck from grass fed cows.
*I don't measure green peppers as I just add what looks right. You want the flavor without it being too prevalent. I dice and freeze peppers from our garden to use all year long, so this comes out of our freezer.
*You can use garlic salt  or powder instead, or not at all, but we like garlic. If you use garlic salt, do not add extra salt.
*We only use real sea salt in our foods, the pink kind put out by Redmond's Real Salt.
*You want 53 ounces tomato sauce total. I like it okay with just 48 ounces, but Bob likes his more saucy, so you can play with these amounts for your desired amount. I mainly use 53 ounces.
*I actually use around 24 ounces of cheese as we like ours cheesy. You can divide the 16 ounces up by using 3/4 of the bag and then sprinkling the rest at the end, or you can cook all cheese in casserole and not top with anymore. We like to use a lot of cheese.
*I only use olive oil spray as I do not use vegetable oil (soy, canola, or other) in any of my cooking.

Wednesday, June 8, 2011

Dad's Marzetti

                                                               
When Kym and I were kids, our dad, Rod Matheson, made this recipe up and we used to love it. My brother Scott continued to make this for his friends up until a few months before he passed away. Scott used to say his friends loved this dish and would ask for it, so that he made it several times a year. As I've gotten older, I do not care so much for it, but it might appeal to others. This recipe is a tribute to my dad's resourcefulness in trying to feed Kym and I when we were young. He made many foods, but this was one dish he created himself that Kym and I used to make, and then Scott started making it after our parents were married in 1974.
Back around 1994, the Columbus Dispatch Food Section (I'd have to dig up my copy to find the actual date) asked for people to submit recipes for Father's Day; recipes that their dads were known for making. I sent in this recipe, with a bit of information, and we were featured in the Dispatch Food Section the week of Father's Day! I thought it a great gift for my dad. He, Kym, and I were professionally photographed for the paper, and dad's recipe was featured, along with two other families. I was so grateful we were chosen as I wanted to honor my dad for all the sacrifices he'd done for Kym and I, and what a fantastic dad he'd always been. My dad has always been there for me, no matter what. And I know as long as he lives, he will be there for me. He was always there for all of us, as best as he could be. My dad is the very best dad in the world. I am grateful to God for blessing me with such a great dad. I hope you enjoy his recipe.

Dad's Marzetti

1-2 pounds ground beef (this amount depends on how much meat you like)
1 onion, chopped
garlic salt, to taste*
pepper, to taste
32 ounces of spaghetti sauce*
1 box (14 oz) Deluxe Macaroni and Cheese (cheese in a pouch)*

Fry ground beef up in a skillet with the onions. Season with garlic salt and pepper. Drain grease and return meat to pan. Add spaghetti sauce and heat. Once warm, simmer till needed.
While ground beef is cooking, heat water for macaroni. Cook macaroni according to box directions, when done, drain and add the cheese pouch to the macaroni, blending well. Stir the meat sauce into the macaroni and cheese and mix well. Serves 4-6.

*I like to use real garlic, minced.
*Spaghetti sauce used to come in 32 oz jars, which was the perfect amount for a pound of spaghetti. The amounts have dropped so that you only get 24-26 oz in a jar, so it will take more than one jar of sauce. Freeze what you don't use for a later use.
*Dad always used Kraft Deluxe Macaroni and Cheese. When we were kids, the cheese sauce came in a small silver can; now it comes in a silver pouch.

Ready to go!


Alright! I got all those family posts done and now I will be posting my own recipes from now on. Either mine or those I've made from others. Of course, I make some of the recipes I've already posted, but these that will follow will be mine, the ones I use on a regular basis or the ones I've created over the years.

Because of the format on this site, I won't be able to keep these recipes in order like a recipe book where I have all meats, all appetizers, etc. I guess I could try to copy them in this manner, but it would prove most daunting and limit me as I will likely post these as I feel like posting them, so bear with me.

I've been cooking since I was just a kid of around seven to seven and a half years old. I had to cook as my mom had left and I was the oldest of four kids. I started out cooking the simple foods of soups from a can, hot dogs, grilled cheese sandwiches, and eggs. It was not until I was ten years old that I began to cook regularly, and I was eleven when I began to bake from scratch and from boxes.

I'm excited to begin to post my own recipes and hope that they will appeal to many people. I am just a down home cook who makes mainly rib-sticking meals that are simple and delicious. I've had many people tell me I should open a restaurant, but in this economy, I don't think so as I read that over 300 restaurants are closing their doors daily! Too much of a risk for me as I'd want quality foods and these cost more than the average. And the cost of food is rising exponentially~ with all the flooding, earthquakes, tornadoes, and droughts, I can see a food shortage on the horizon, especially for grains such as wheat and corn, and soybeans. No, we do not eat soy if we can help it as soy is NOT  health food, but factory farmed animals are fed soy and corn-based feeds, which means the cost of meats will continue to increase in price. I often buy 'natural' meats that are supposed to be free of antibiotics and hormones, but the cost is sometimes out of my budget. I've also bought grass-fed beef when I've caught it on sale, but this is not often as it rarely goes on sale, and when it does, it means a trip to the north side of Columbus.
I also want you all to note that I try to eat only real foods as much as possible. I do on occasion use a boxed instant pudding mix or maybe once in awhile a boxed cake mix, but mainly I make my own. I will post some recipes that use convenience foods, but overall, I tend to use only real foods. A list of the real foods we consume are as follows: Redmond's Real sea salt (this is pink and found in some groceries, but found in most health food stores), real lard and tallow that I've rendered down, strained, and frozen; extra virgin olive oil, palm shortening (from Tropical Traditions, see side bar for listings), organic coconut oil, organic palm oil, real whipped cream, organic, free-range eggs from a local farm, real (raw) milk, real butter, unbleached flour when using white flour, whole wheat when using wheat flour, and fresh or frozen vegetables and fruits, as much as possible. I do on occasion use canned beans for convenience, and I do can my own produce from my garden and we use these. I do keep canned fruits and vegetables in the house for emergencies and sometimes convenience, but we use them sparingly as they do not have much in the way of nutritional value.
Happy eating!
Lori