Friday, January 11, 2019

Lori's Arm or Chuck Roast

                                       
               Arm Roast, browned, and ready to go into the oven.

An Arm Roast is similar to a chuck roast, but not as fatty. I bought this roast from a small store in Thornport, about a 20 minute drive from my house. I cannot find an Arm Roast in a regular store anymore as the big grocer's get all of their meats from one large location. These meats come in wrapped, frozen and boxed. TC Market still cuts a lot of their meat and has real butchers. They also often cut up local beef they buy from farmers.

When I used to work in a grocery store (1979-1983), we ordered in hanging sides of beef and the butcher would cut the meat into roasts, steaks, cutlets, and ground their own hamburger from pieces of meat from various parts of the beef. We had cuts that are no longer found in grocery stores- Arm roasts, flank steaks, brisket. We also had meat with bones in it such as above. If you look real close you will see the bone in the middle of my roast above. It got a little burned when I was browning the meat, but it will not affect the taste of the roast. In fact, back in the day, most all cuts of meat came with bones in them and the boneless cuts were a lot more expensive.

The last time I bought a roast from our local grocery store (Kroger), I bought one during their buy one, get one sale. I always make sure there is no more than .10c difference in price so I am not getting ripped off. I bought two chuck steaks that were about 1.5 pounds each. With just Bob and I here most of the time, this is plenty for the two of us.

                                       
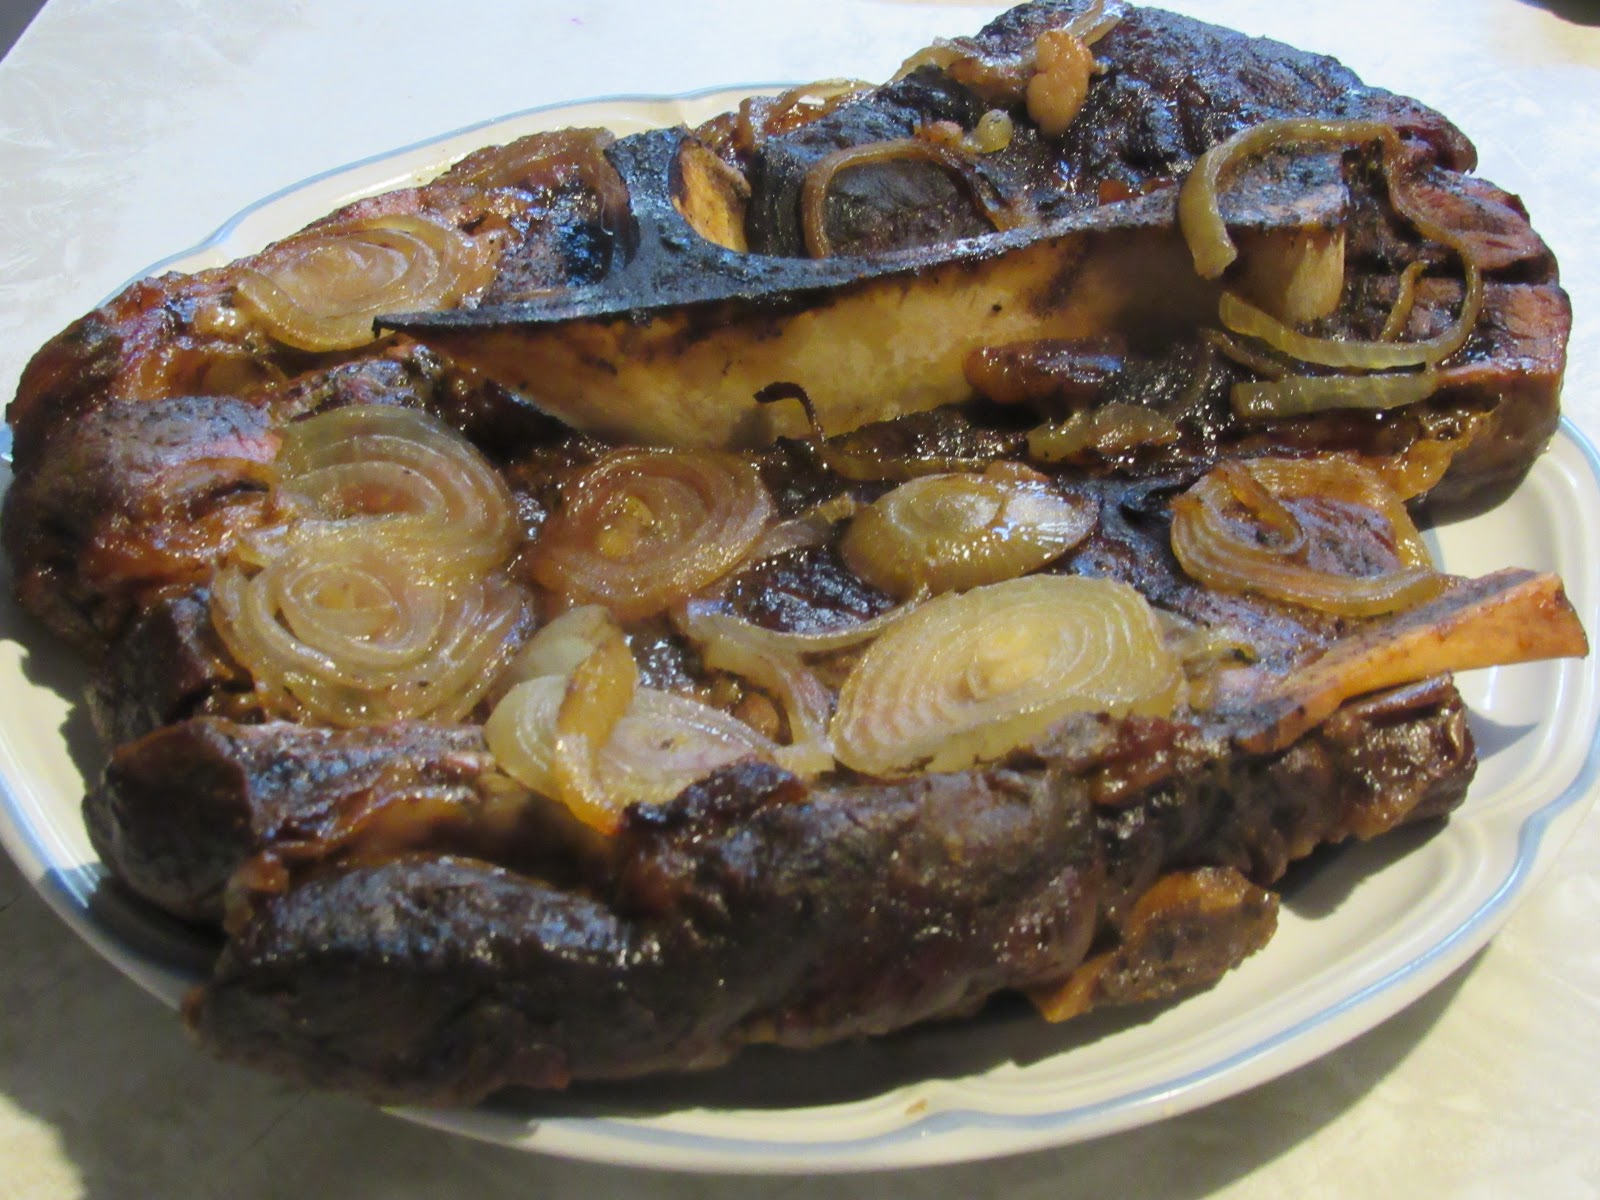
The finished roast with caramelized onions.

I've cooked hundreds of roasts in my life, I mean hundreds, and my kids loved having roast for dinner. I know how to cook a roast. When I cooked the two roasts (different times) I'd bought from my local store- they were as tough as rubber. I cooked those babies for 5 hours!!!! a 1.5 pound roast should only have to cook about 1- 1.5 hours to fall apart, and I could not get this meat to tenderize!!!! It was awful. I will no longer buy my beef from my local grocery stores. I get my hamburger from a small Mennonite store, and my other beef from TC Market.

                                       
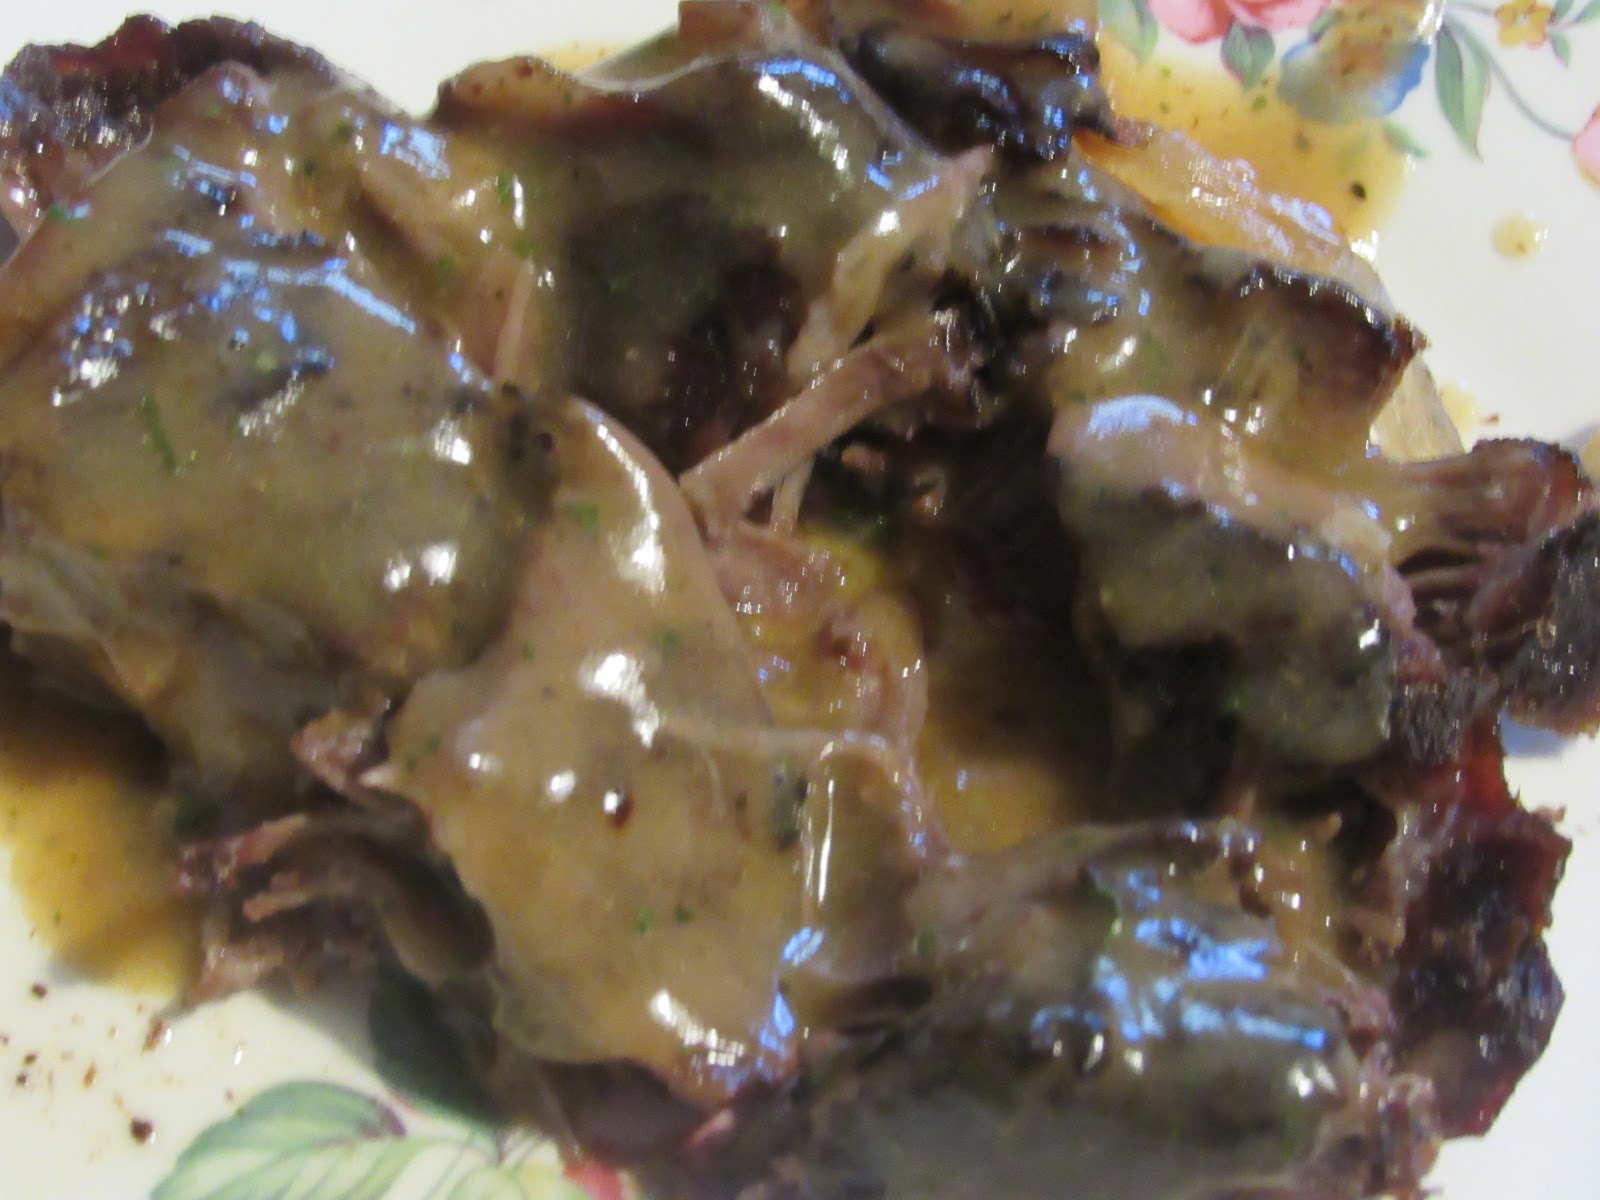
The roast with gravy on a plate. 

Meats from the local grocery stores come from large CAFO farms and are either given an antibiotic 30 days before slaughter to make the cow gain up to 30% more weight, or they are killed under stressful situations. Both of these scenarios will make meat tough, and no amount of cooking will make them tender. I tend to believe it was an antibiotic added to the feed to make the cow grow larger that caused the roasts I had to be so tough. I do not want to have antibiotics in my meat. I also do not want to pay a premium price for rubberized meats that will not cook up properly. So now I get my beef only from TC Market where I know the meat is not full of antibiotics and most comes from local farmers.

Whether you make an Arm or Chuck Roast, this is good. Remember, chuck roast is usually a bit fattier and there will be more fat in the broth when done cooking.

Lori's Arm Roast
(Same for Chuck Roast)                       
                                               Preheat oven to 350 degrees F.

1 Arm or Chuck Roast, about 3.5- 4 pounds
1 Tbls of olive oil
Salt and pepper, to taste
Garlic powder or real garlic, sliced and added to meat*
1 medium onion, sliced thin
1-2 bay leaves, optional
Water or beef broth*
3-4 Beef bouillon cubes*
2 Tbls real butter
3 Tbls flour
Parsley

I always rinse my meats and pat dry.
Place a cast iron skillet or Dutch oven on the stove on medium heat. I often spray some cooking spray on the pan on sides so the meat won't stick. This is up to you.
Put in olive oil and swirl around.
Add meat and brown on both sides, about 4-5 minutes on each side.
Once browned, add some water to about half way or so up on sides of beef. Add bouillon cubes to the water, if used.
Turn off heat under skillet.
Salt and pepper the roast.
Place some sliced garlic on roast, and also sliced onions. The onions can be broken up into rings or kept whole. You can also add a bay leaf or two, if desired.
Put on lid and place in center rack of 350 F oven.
Roast for about 2 hours. Check about halfway through to see if it needs more water or broth.
Check for tenderness of roast, a fork should go right into it and you can feel the tenderness. You can allow to cook a bit longer, if needed.
Remove from oven
Take roast out of pan (I usually use two spatulas to try to lift it) and place on a platter.
Remove bay leaves, if used, and throw away or compost.
Pour broth into a small pan. Take off some of the fat, about 2 Tbls, and place in skillet.
Measure out 2 cups of broth, adding water or canned broth, to make 2 cups.
Place skillet over medium heat (use a pot holder as skillet will be hot!).
Melt butter in pan, along with fat, then stir in flour.
Cook for about 1 minute.
Pour broth back into skillet, stirring constantly and bring to a small boil and gravy thickens. Season with some salt and pepper, to taste, and some parsley.
Place roast back in the gravy, if desired.
Serve with mashed potatoes, a vegetable of your choice, and either homemade biscuits or dinner rolls.

Tips:
*If using broth and not water, you may not want to use the bouillon cubes.
*If using bouillon cubes, try to find a brand such as Herb-Ox Bouillon cubes as they do not use MSG in their products.
*If you do not like garlic, just don't use. Ditto for the onions.

Sunday, January 6, 2019

Hash Brown, Spinach, Egg Casserole


Hash Brown, Spinach, Egg Casserole

   This turned out so delicious! I am trying to incorporate more healthy eating into my diet and I am not a fan of spinach, but this was surprisingly good. This recipe is also very versatile as you can use hash browns or not, you can fry up the hash browns first if you want them crispy (stove top or in the oven), you can change up the vegetables by adding mushrooms and diced tomatoes, if you'd like, or taking out whatever you don't like. The nice thing about casseroles is there are no hard and fast rules.
   Take this recipe, for example. I really didn't measure anything as I am a 'dump' cook- I just dump things in until they look right. However, to make it easier for others, I will give exact measurements, though I eye-balled this recipe as I put it together. 
   This is a delicious recipe for lazy weekend mornings, to make up ahead and portion out and heat up through the week for quick on-the-go breakfasts, or for when company comes. It would also make a good Christmas morning breakfast, and by adding diced tomatoes you would get the festive red and green colors.By replacing the milk with cream and omitting the potatoes, this would be a good low-carb meal for those watching their carbs.

Hash Brown, Spinach, Egg Casserole
                                                                   Preheat oven to 350 degrees F.

2 Tablespoons real butter
1 bag 12-16 oz fresh spinach
1 medium green pepper, diced
6 scallions, diced
2 cups or so of hash brown potatoes (frozen works)
8 eggs, beaten
1/2 cup milk
6-8 ounces Cheddar-Jack cheese, grated
Salt and pepper, to taste

Grease a 9"-10" pan and set aside.
In a 10-12" skillet, melt the butter over medium heat and then add about half the bag of spinach, stirring with a wooden spoon until it starts to wilt enough to add the rest of the spinach. Cook, stirring fairly constant, until spinach is completely wilted but still dark green. Remove from heat and set aside.
In a medium mixing bowl, add 8 eggs and beat well with a whisk. Add milk and beat well. Add the hash brown potatoes, green peppers, scallions, spinach cheese, salt and pepper and stir well with the wooden spoon. Pour mixture into the greased pan. Place in oven and bake for about 45 minutes until eggs are set and just beginning to brown on top. Remove from oven and let sit for about 5-10 minutes to set up before cutting into squares for serving. Serves 5-6 people.


Tips:

*You can use any vegetables you like- fresh tomatoes diced, mushrooms, chopped, kale instead of spinach, etc.
*You can replace the milk with cream for low-carb- or replace milk with about 6-8 ounces of sour cream.
*Any favorite cheese can be used, and you can add less or more, depending on taste.
*You can grate fresh potatoes or use frozen hash browns. If frozen, they do not need to be thawed.
*You can mix the hash browns with about a tablespoon or so of olive oil, place them in the casserole dish and bake at 450 degrees in oven until crisped, about 25 minutes. Watch they don't burn. Then add other ingredients on top and bake as described..
*You can add any meats you like: cubed pieces of ham (1-1 1/2 cups), fried and crumbled bacon (6-10 slices), fried, crumbled and drained sausage (6-8 ounces).

Thursday, September 8, 2016

                                     
         Farm fresh milk, eggs and homemade butter.

Hillbilly Cake

     I took this to my most recent family reunion (Aug 27, 2016) and the family loved it. I didn't bring any home. It is a delicious dessert and I've made it often in the long ago past. I originally got it from a church cook book from the Nazarene Church in Pataskala that I used to attend. One of my friends had put this recipe in the book and she had also made it to bring to a couple of pot lucks at the church.
     It can be expensive to make as the angel food cakes sold in the bakeries at the store are not as big as they used to be and they are expensive. You could make a boxed angel food cake from the baking aisle, or you could make your own homemade angel food cake with farm fresh egg whites.
     I am going to post this recipe as it was written. I will give more healthier choices below. I will also post a recipe for making your own strawberry glaze below.
     This is delicious and easy to make. Enjoy!

Hillbilly Cake

1- Angle Food Cake, 16 ounces*
1-Large Instant Vanilla Pudding Mix (6 3/4 oz size)*
1-Quart strawberries, hulled and sliced*
1-Pkg strawberry glaze*
1-12 oz container Cool Whip, thawed*

Break up cake into bite-sized pieces and layer in a 13" x 9" pan.
Make pudding mix according to directions on box.
Pour evenly over cake in pan and allow to set up for 15 minutes.
Meanwhile, wash, hull, and slice the strawberries into bite-sized pieces.
Combine strawberry glaze and strawberries and pour evenly over pudding mix.
Spread Cool Whip evenly over glaze.
Cover and chill for 2 hours before serving.
Cover and chill any leftovers.

*Most angel food cakes today are not a full sized cake. If you make your own, you may have to put in a larger pan such as 15" x 10" pan.
*You can make your own angel food cake using Betty Crocker recipe online or in cookbooks.
*You can make a simple vanilla pudding with recipe on any cornstarch box (try to use organic cornstarch)
*I used organic strawberries.
*Glaze can be made with more strawberries, recipe follows.
*Homemade whipping cream with added unflavored gelatin will hold up and is a better option.

Strawberry Glaze Recipe

4 cups ripe strawberries (organic is preferable).
1/2 cup sugar
4 1/2 teaspoons corn starch dissolved in 1/4 cup cold water
1 Tablespoon real butter
2 teaspoons real lemon juice (ream from fresh lemons)

Crush enough strawberries to make 1 cup pulp.
Place pulp in medium sized sauce pan, add sugar and cornstarch mixture.
Stir and cook over medium heat until mixture comes to a boil and thickens, about 2 minutes. Glaze should be clear.
Remove pan from heat; add butter and lemon juice.
Cool to room temperature.


Saturday, March 7, 2015

Lori's Snickerdoodles Cookies

                                Lori's Snickerdoodles Cookies

I've been making these for so long that I no longer remember where I found the recipe. I make these most years at Christmas time, having them for the kids and grandkids, and giving some away. These are a favorite of some of my kids and grandchildren. They are easy to make and delicious.
Many people make the bad choice of over-baking these, which makes them hard instead of just crisp. It is important to pull these out and allow them to set up for a minute or so on the cookie sheet before transferring to a wire rack to cool. The recipe I use makes a large batch, but they freeze well.
I am going to give the large recipe that I make, then I will give a smaller version, though it is the same cookie.

 Lori's Snickerdoodles Cookies
                                                           400 degrees
5 1/3 cups unbleached flour, sifted
4 teaspoons cream of tartar
2 teaspoons baking soda
1 pound real butter, soft (4 sticks)
3 cups sugar
4 eggs
1/3 cup sugar
5 teaspoons ground cinnamon

In a large bowl, sift together dry ingredients; set aside.
In another large bowl, cream together the butter and sugar till light and fluffy. Beat in eggs and blend well. Stir in dry ingredients and mix well.
Chill, if necessary, or until firm enough to handle.
In a small bowl, combine sugar and cinnamon; blend well.
Using flour to cover hands, roll dough into balls the size of walnuts.
Roll in cinnamon sugar mixture, then place 3" apart onto a lightly greased cookie sheet.
Bake at 400 degrees for 8-10 minutes, being careful not to overbake.
Makes about 10 dozen cookies.
These freeze well.

Smaller version:

1 1/3 cups unbleached flour
1 teaspoon cream of tartar
1/2 teaspoon baking soda
1/2 cup butter
3/4 cup sugar
1 egg
4 teaspoon sugar
1 1/4 teaspoon cinnamon.
Make as above. Makes 2 1/2 dozen cookies.


Tuesday, February 3, 2015

Aunt Helen's Nutmeg Cake (DiPietro side)

                                     
Aunt Helen's Nutmeg Cake (DiPietro side)

I have been married to Bob for close to 32 years and it was not until last spring that my Mother-in-law Judy brought us out a pan of this cake. Bob had not had this cake in over 34 years and had totally forgotten about it, though it was favorite of his. Judy had never made this anytime we were around. I could not believe it. I thought I had all of the 'favorite family' recipes of hers, and then she came bringing this out and everyone was in love with it. Bob was especially enamored as this was one of his favorite cakes as a child. My grandson Joe loves this cake, too, and I think it is now his favorite. It is just the right spiciness and sweetness.

It seems every recipe I get from Judy must be revised, and this one was no exception! She knows how she makes her recipes and so they are basic recipes without any special instructions. I decided to make this special for Bob a month or so ago, and I noticed the icing didn't quite look like Judy's. No wonder! She sends the nuts and the coconut through the nut grinder to make them into small pieces, but this was not on the recipe (see what I mean by having to be revised), but it was still tasty and delicious. Bob is the one who told me I needed to grind the coconut and pecans as this was his job as a child when his mom would make this cake. That is one way to get kids to help in the kitchen!

The aunt Helen who is listed is a long ago relative whom Bob never knew as she was dead by the time he came along. Judy remembers her, and also her cake. I am glad to be able to add this to my recipe collection, and I think you will, too. It is not overly spicy, simple yet charming, moist and delicious. I think this cake looks more lovely baked in a *glass pan.

Aunt Helen's Nutmeg Cake
                                                                              Preheat oven to 350 degrees
1 cup moist coconut (sweetened or unsweet)
1/2- 1 cup pecans
2 cups flour*
1 tsp baking soda
1 tsp baking powder
1 tsp ground nutmeg*
1/4 tsp salt
1 stick real butter (1/2 cup)*
1/2 cup sugar
1 tsp vanilla
3 eggs, slightly beaten*
1 cup buttermilk*

6 Tbls melted real butter
2/3 cup brown sugar, packed
1/4 cup coffee cream*
Butter or lard for greasing pan, about 2 Tbls*

Run coconut and pecans through a nut grinder or your food processor to make into small bits. If using a food processor, do not over-process. Set aside. (I've made both ways and I tend to like this with the coconut "as is" without grinding, and I use small pecan pieces, which I think is fine. The choice is yours).

Grease well with butter or lard a 13" x 9" pan; set aside.

In a medium bowl, sift together the flour, baking soda, baking powder, nutmeg, and salt. Set aside.
In a large mixing bowl, cream together 1 stick butter, 1/2 cup sugar, and vanilla.
Add the eggs and beat well to blend.
Alternately add the dry ingredients and the buttermilk to the creamed mixture, starting with and ending with the dry ingredients. Beat for 2 minutes at medium speed of electric mixer.
Pour into prepared pan and spread to make even. Bake at 350 degrees for 20-25 minutes, or until tests done with a toothpick. Remove from oven.
While cake is baking and almost done, prepare the icing as follows:
In a small pan, melt together the 6 Tbls melted butter, add in the brown sugar and coffee cream, and cook for a few minutes just to the almost boil stage. Add in the coconut and pecans and remove from heat.
Turn oven onto broil.
Spread the icing onto cake evenly. Place under broiler and brown lightly, being careful not to burn. Watch it closely. It will take 2-5 minutes.
Remove from heat and allow to cool.
Serves 24.

Tips:
* Use unbleached flour.
* Use real butter only.
* I did not have coffee cream so I used whole milk.
* You can use fresh nutmeg and grate amount needed for more fresh and intense flavor.
* I used real butter to grease my pan, taking an empty butter paper and wiping the butter in all corners and crevices of pan, making sure to coat well so cake would not stick.
* If you use a glass pan, lower the heat to 325 degrees F.


Lori's Homemade Stuffing


Lori's Homemade Stuffing

This is a variation on the Classic Betty Crocker recipe which I found to be good, but it needed a bit more 'oomph'. The original recipe just did not have enough taste, which I thought made it more like croutons rather than stuffing. I love good stuffing, and this one is easy to throw together.
Stuffing is comfort food that smells of herbs and spices, onions and celery, and is wonderful with a rich homemade gravy over top. You can make this for any occasion, not just Thanksgiving or Christmas, as it comes together quickly and cooks on its own. And don't be afraid to play around with different ingredients and make this truly your own "Classic" stuffing recipe.
You can adjust the seasonings to fit your family's tastes and needs.

Lori's Homemade Stuffing
                                                   Preheat oven 325 degrees
3/4 cup real butter*
2 large stalks celery, about 1 1/2 cups, chopped small
1 cup finely chopped onion
9 cups soft bread, cut into about 1" cubes (15 slices)*
3/4 tsp dried thyme
3/4 tsp ground sage
1/2 tsp ground poultry seasoning
Real Sea Salt, to taste
Black pepper, to taste
Chicken or turkey broth*

In a skillet over medium heat, cook celery and onions in butter until tender, about 10 minutes.
Add the herbs and spices to the skillet and stir in well.
Place bread pieces in a very large bowl, then pour celery/onion mixture over top and toss well to coat.
Add some chicken broth to moisten. Start with a small amount, toss bread, then add some more, if needed. You do not want this to be too very wet, so you might use about 1/2 cup total. You will know by feel if it is too wet or not.
Pour mixture into a 13" x 9" pan and spread evenly.
Cover with foil.
Bake at 325 degrees for about 45 minutes, removing foil the last 15 minutes.
This will stuff a 10-12 pound turkey.

Tips: 
* Use only real butter for best results in taste and health.
* You can use any kind of bread, homemade or store-bought, but make sure it is a high quality bread that is free of HFCS. You can use all white, all wheat, a mixture of the two, or even multi-grain breads, the choice of bread is up to you.
* You can use canned or homemade broth.
* You could add mushrooms, nuts, fruits, or even cooked and crumbled sausage to this recipe, it is up to you.
* If you do not like onions, leave them out. Same for the celery. Adjust the vegetables to what you like.
* I like a robust flavored stuffing, yet mild enough for small children to enjoy. You can add more or less seasonings, depending on your taste preference. You can also sub fresh herbs for the dried, just make sure you adjust amounts as you would use more fresh than dried, usually around 2-3 x's more.


Monday, February 2, 2015

Easy Cream Cheese Onion Dip With Variations


Easy Cream Cheese Onion Dip

This is so easy that I do not understand why anyone would buy the junk sold in the dairy section of the stores. If you love onion dip, you will love this.I am going to post the basics and all the variations I have made. All are good. All are popular when served to family and friends. All are easy to make. This can also be made to use as a dip with vegetables. This is easily doubled or even tripled, if making for a crowd.

Easy Cream Cheese Onion Dip

2 packages of cream cheese, room temp*
1/2 a bunch of scallions (green onions), maybe 4-5, chopped, using the green and the white parts
1/4 cup whole milk

Allow cream cheese to sit out at room temperature for ease of mixing. Place cream cheese in a medium-sized mixing bowl. Chop onions and add to the cream cheese. Pour in the milk. Either use an electric mixer or your very clean hands and mix well to blend. Using a spatula, scrape into a bowl that will hold 2 cups (1 pint); cover and chill for a couple of hours or more before serving. Pull out and allow to set at room temp for 30 minutes before serving to soften the cheese and make it easy to dip. Serve with potato chips, on crackers, or with mixed raw vegetables of your choice.

Gilding the Lily: I have made this before by using green onions, chives, and a small amount of yellow onion chopped up, along with a beef bouillon cube. I made a double recipe with 4 pkgs. cream cheese, one bunch of scallions chopped, a small handful of fresh chives, chopped (maybe a 1/8 cup or so), and about a 1/4 cup finely chopped yellow onion with 2 beef bouillon cubes dissolved.

You can change this up as much as you like by adding some chopped chives to the onions. If fresh, use about a Tbls chopped fine. If dry, use about 1 tsp. 

You can also dissolve a beef bouillon cube* in a Tbls of very hot water and mix in with the milk.
If you have dried a lot of your vegetables (celery, carrots, green pepper, etc) you can add about 1/4  to 1/2 cup dried veggies to the cheese to make a veggie dip, along with a dissolved cube of beef bouillon cube.

To make this a 'dilly' dip, add 3 Tbls of dried dillweed, 1/4 tsp of garlic powder, 1/4 tsp of onion powder or dried chives, and one cube dissolved beef bouillon.

You can also make this a taco dip for corn tortillas. Combine 2 tsp dried minced onion, 1 1/2 tsp chili powder, 1 tsp salt, 1/4 tsp ground red pepper, 1/2 tsp ground garlic powder, 1/2 tsp cane sugar, and 1/2 tsp ground cumin. Add all to the cream cheese and milk mixture.

As you can see, this is a very versatile base for many dips and a much better choice than the store-bought dips from the store.

Tips: 
* Use whole-fat cream cheese.
*You can double, triple, quadruple, etc, the recipe, just make sure you add appropriate amounts of
   seasonings used.
* Use whole fat milk.
* Make sure the bouillon you use is MSG-free, such as Herb-Ox.